
JCal Pro is an extremely flexible Joomla calendaring extension. You can allow some of its administration tasks to a frontend user. For example, you can set a user to create JCal Pro events. You can also set a user to moderate created events.
But in JCal Pro you can also allow one of your Joomla users full access to JCal Pro administration interface. This user will be able to log into your Joomla administrator panel and get access to JCal Pro, and to JCal Pro only.
Let me show you how to approach such a setting.
Once you allow your Joomla user access to JCal Pro administration, they will be able to log into your Joomla administrator panel.
Here is what they see in it:
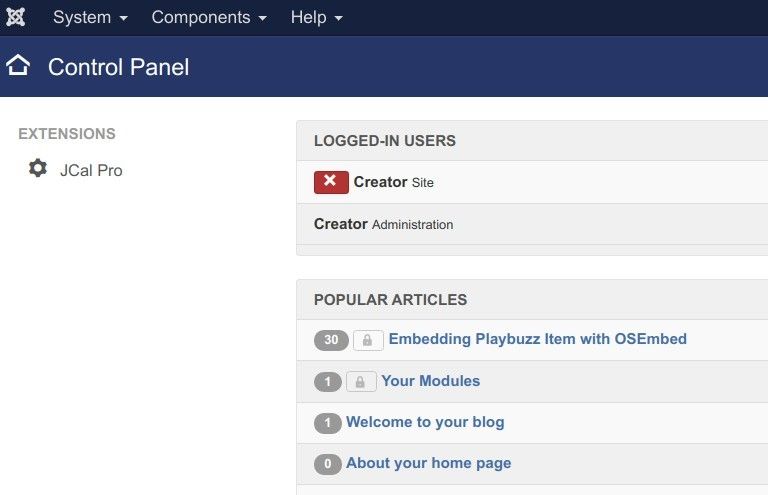
They find the main top navigation menu with three menus only:
- "System"
- "Components"
- "Help".
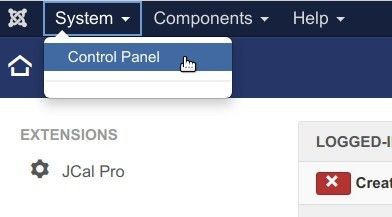
The "System" and the "Components" menus will be reduced for them. The only menu item our JCal Pro administrator will be able to see under the "System" is "Control Panel":
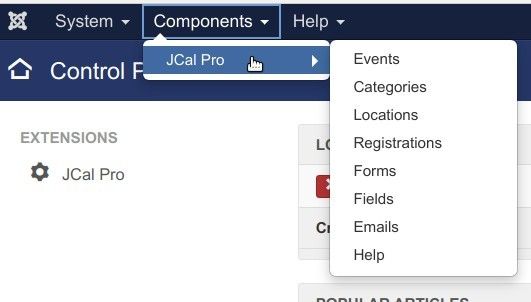
The only menu item they will be able to find under the "Components" will be "JCal Pro":
To create a user with access to JCal Pro administration interface is a five-step process:
- You would create a JCal Pro interface administrator group
- You then would create a JCal Pro interface administrator access level
- Next you want to assign your JCal Pro interface administrator to the Joomla's "Manager" group
- Then you would allow the JCal Pro interface administrator group access to JCal Pro administrator interface
- And finally, you want to deny the JCal Pro interface administrator group access to the administrator interface of the rest of your Joomla and 3-rd party components
Let's take a look at this process in more detail.
Step #1. Create a JCal Pro interface administrator group
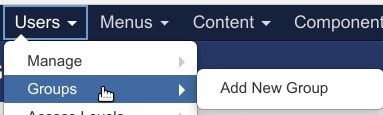
In your Joomla administrator panel, you will need to go to "Users" > "Groups" > "Add New Group":
That will take you to the "Users: New Group" screen. There you would need to create a new group. Here is the group I created for my demonstration:
- Group Title: give it a descriptive name, similar to "JCal Pro Administrator".
- Group Parent: Select "Manager":
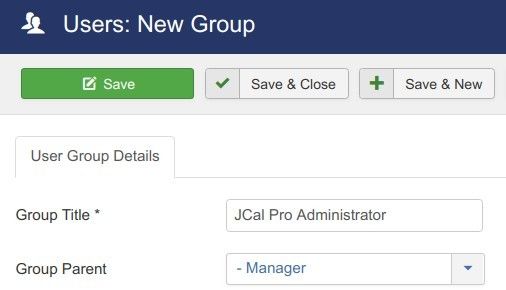
To apply the changes, you would want to click "Save & Close". Excellent! Let's move on.
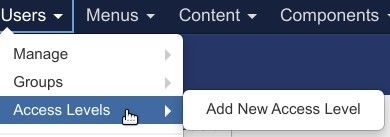
Step #2. Create a JCal Pro interface administrator access level
In this step, you would want to go to "Users" > "Access Level" > "Add New Access Level":
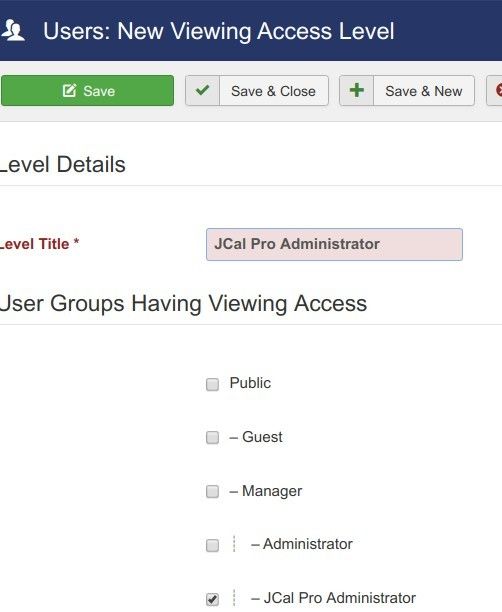
You want to create a new access level. Here is the one I created for this demonstration:
- Level Title: enter here a descriptive title, similar to "JCal Pro Administrator".
- User Groups Having Viewing Access: select the "JCal Pro Administrator" user group you just created a minute ago:
Once again, it's a good time to click "Save & Close".
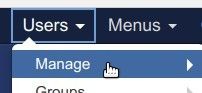
Step #3. Assign a Joomla user to the group of JCal Pro administrator
To work with users, you would go to "Users" > "Manage":
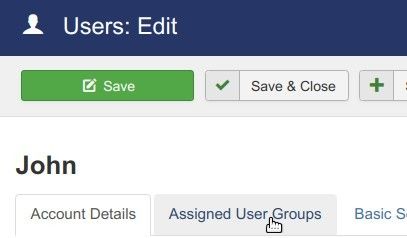
This will bring you to the "Users" screen. Under the "Name" column, you would click on the name of the Joomla user whom you would like to promote to your JCal Pro administrator.
You will be taken to the "Users: Edit" screen. Once there, you would click the "Assigned User Groups" tab:
Then you want to click inside the checkbox next to your new JCal Pro administrator group:
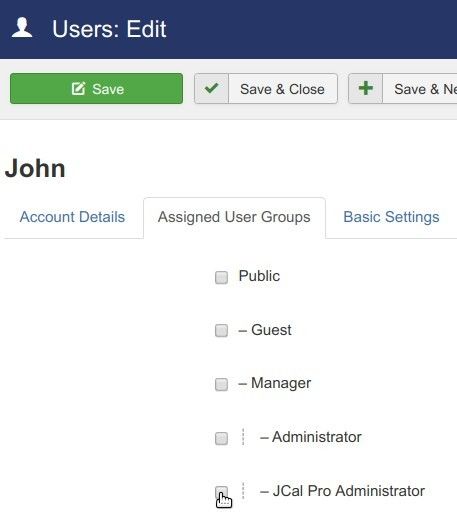
To save these changes, you would click "Save & Close".
Step #4. Allow the JCal Pro interface administrator group access to JCal Pro administrator interface
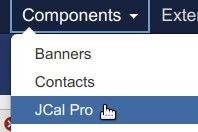
Now you would want to go to "Components" > "JCal Pro":
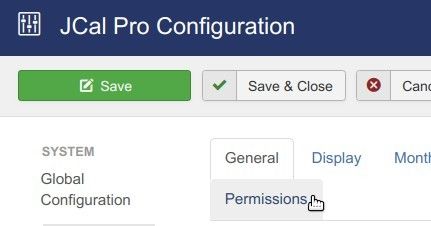
You will see the "JCal Pro: Events" screen. In the top right corner of the screen, you would want to click "Options":

This will bring you to the "JCal Pro Configuration" page. On this screen, you would want to click the "Permissions" tab:
Then you want to click on your JCal Pro administrator group name:
There you would want to set the "Access Administrator Interface" to "Allowed":

To save the changes, you click "Save & Close".
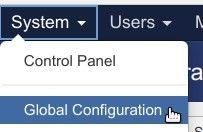
Step #5. Deny the JCal Pro interface administrator group access to the administrator interface of the rest of your Joomla and 3-rd party components
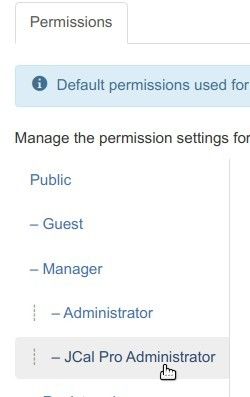
Now would be agood time to go to "System" > "Global Configuration":
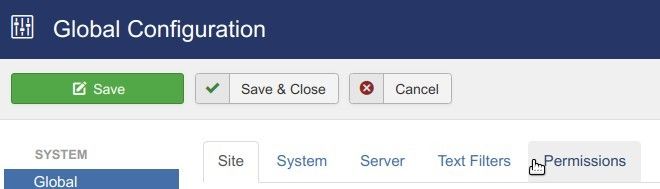
This will bring you to the "Global Configuration" screen. On this screen, you want to click the "Permissions" tab:
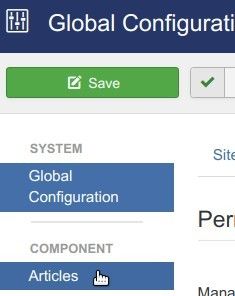
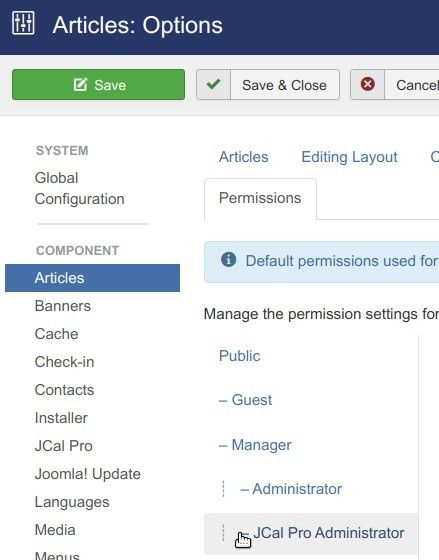
Under the "Component" column, you want to click "Articles":
Then you want to click on the name of the group of your JCal Pro administrator:
Under the "Actions" column, find the "Access Administration Interface" action. Set it to "Deny":

Next, you want to repeat this step. You want to deny the "Access Administration Interface" action to your JCal Pro administrator group for the rest of the components listed under your "Components" column.
Once done, you would want to click "Save & Close".
Not try to log into your Joomla administrator panel as the Joomla user to whom you allowed to access administration Interface of your JCal Pro and denied it for the rest of your components.
You should see the same screen you've seen at the beginning of this tutorial.
What's Next?
What's Next?
Save $1,000's when you sign up for Joomlashack's Everything Club.
You will get your hands on our extensive range of over 20 extensions, plus legendary support!