Before Joomla 1.7 if you wanted to publish picture galleries, you needed to get a special component with plugins and modules. Now with the expanded nesting categories, ACL and a free plugin, you can duplicate most of the functionality of a gallery component.
I've done this with three free plugins, Simple Image Gallery by JoomlaWorks and Rok Box by Rockettheme both work for this, and have different display options in case you want to customize.. You can use the native ACL management to control user access, but you may also want to use the ACL Manager plugin to simplify the task. Our extension, OSContent will make organization even easier.
Step 1. Choose And Download A Simple Gallery
My definition of simple is that the component generates the thumbnails and enlarged pictures on its own, and links up with something like Slimbox or other popup picture feature, and allows an easy upload for the pictures.
- RokBox is available from RocketTheme
- Simple Image Gallery is available from JoomlaWorks
- The ACL Manger can be downloaded from ACL Manager for Joomla
- Get OS Content at https://www.ostraining.com/oscontent/
Both Simple Image Gallery and RokBox are used in a similar manner. You insert a short code into an article, and call pictures straight from a directory on your server. This makes using them for gallery building an identical process, though the features and capability of each is slightly different..
For Rok Box you insert code similar to this:
{rokbox album=|myalbum|}images/stories/food/*{/rokbox}
For Simple Image Gallery the code would look like this
{gallery} imagefolder{/gallery}
The plugins make it possible to simply specify an image path between custom start and end tags. You can get detailed instructions on writing the tags from the authors' websites. The purpose of this tutorial is to teach you how to build a multi-level gallery. I will use Simple Image Gallery for the demonstration.
Step 2. Install Using The Extension Manager
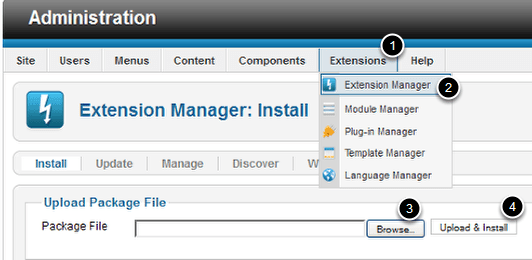
Go to Extensions > Extension Manager. Browse to the downloaded files and click Upload & Install
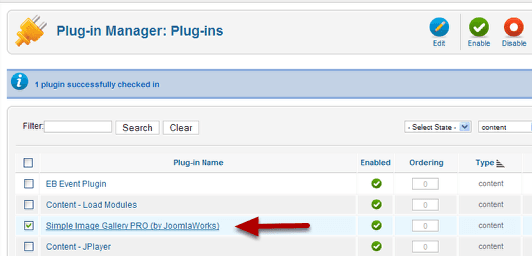
Step 3. Activate The Plugin

Plugins are not components or modules. You will need to go to the Plug-in Manager to enable them.
Go to Extensions > Plug-in Manager and change the red dot to a green plus by clicking on it.
NOTE: I have both Simple Image Gallery and Rokbox installed. You will not need both of them, Just install and activate the one you want to use.
You won't be able to access their configuration from the Components Menu, or when you choose them, like you can with modules and articles. The configuration is accessible from within the Plug-in manager.
Step 4. Configure The Plugins
To get to the configuration screen, click the name of the plugin in the list. Or you can click the check box, then the edit icon at the top of the page.
Step 5. Read The Directions And Define Settings.
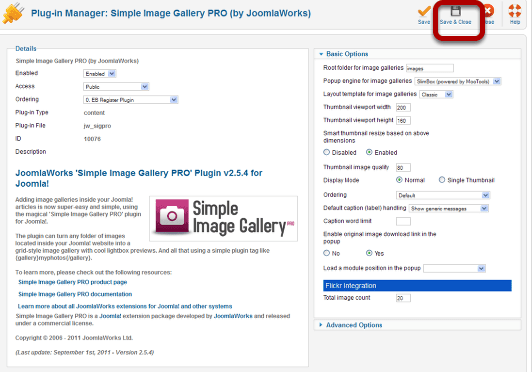
You'll see the configuration Details and Option boxes. Make your selections and click Save & Close.
Step 6. Create Folders On Your Site And Upload All Your Pictures
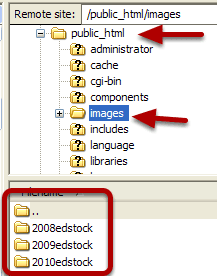
Create a separate folder for each gallery and place them in your images folder on the server. You can use FTP, your file manager or any bulk upload method.
TIP: To save yourself a lot of trouble, make sure the file names DO NOT have spaces or punctuation in them. You may be able to use spaces, but the safest thing is no spaces and only "-" or "_" if you need to separate words to make it easier to read. If you try some with spaces and it works, go ahead, but different plugins handle file names differently.
Step 7. Start Building Your Multi-Level Gallery Using The CASh Work Flow.
The best way to approach this is to start by Categorizing, Adding, and then Showing your content.
Think about and decided what Categories you want and how you will nest them before you start building.
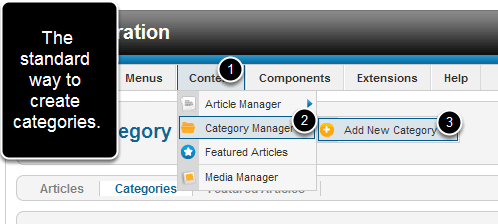
Go to Content > Category Manager > Add New Category.
OR if you want to make it really easy download our component OS Content and you can create all your categories in a single interface. It will save you LOTS of time adding, then saving, then adding etc etc. etc.
Download it here - https://www.ostraining.com/oscontent/
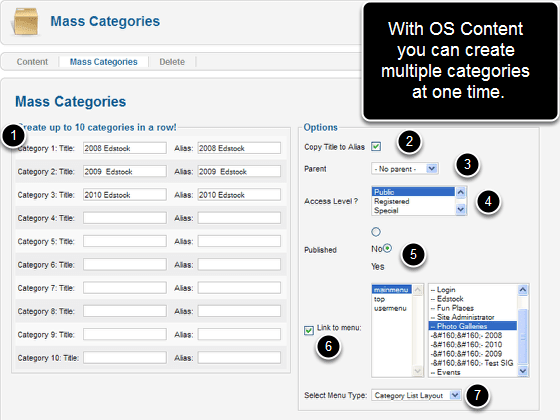
OS content will allow you to:
- Create many categories at once,
- Assign them to a parent category or put them on the top level
- Autofill the alias
- Publish the pages and
- Create and add the links to the menu
When you are done with that go to the Content Tab and create your Galleries
Step 8. Go To Mass Content > Content Tab And Add Your Gallery Code
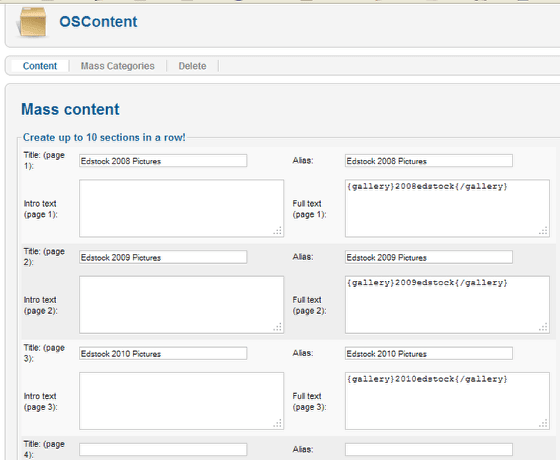
Under the Content section you can create many pages. Just give each page a title. You can use the intro text to create a description of the gallery or you can put it in the Full Text box. In the Full Text box add the code that will include the gallery. For Simple Image Gallery we added {gallery}foldername{/gallery} You could put other html or text in the boxes, and style the entire page.
OS Content will create multiple pages all at once.
Step 9. Adjust The Options
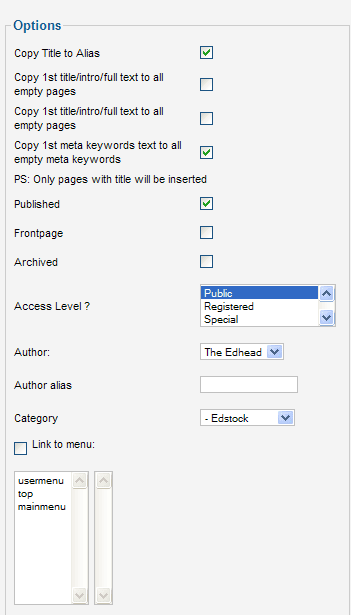
Adjust the options on the right side of the same page. Save your work and you have just created an image section, with sub galleries AND all the menu links to the galleries, and set preliminary permissions for viewing.
You can fine-tune the permissions by using the ACL Manager plugin. Click here to read our tutorial on on installing and using the ACL Manager.