
One of our customers asked how to work with Joomla modules. Modules are small blocks around the edges of your site. They make life easier for your site’s visitors.
They allow visitors to quickly find information, links, or features. In this tutorial, you will learn how to create Joomla modules.
You'll also learn the three ways in which you can control modules. You'll learn how to:
- Change the position of modules
- Change the order that modules appear in
- Change menu links that modules appear on.
Before You Start
To follow along with this tutorial, please install Joomla using the "Learn Joomla English" Sample content.
Understanding Modules
Modules normally go around the left, right, top, and bottom of your site. The default Joomla template has more than a dozen different places where you can place them. It is possible to get a visual guide to your template's module positions:
- Go to "Extensions", "Templates", and then "Templates".
- Click "Options" and set "Preview Module Positions" to "Enabled".
- Click "Save & Close".
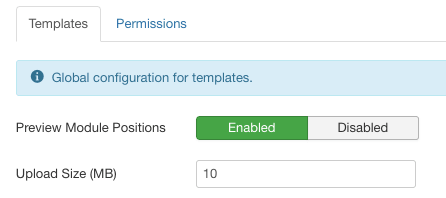
- Scroll down and click the "Preview" link next to Protostar Details and Files, as shown in the image below. Protostar is the name of the template that I will be using in this tutorial.

- You now see the template, but you also now see the various module positions it contains, as shown in the image below:
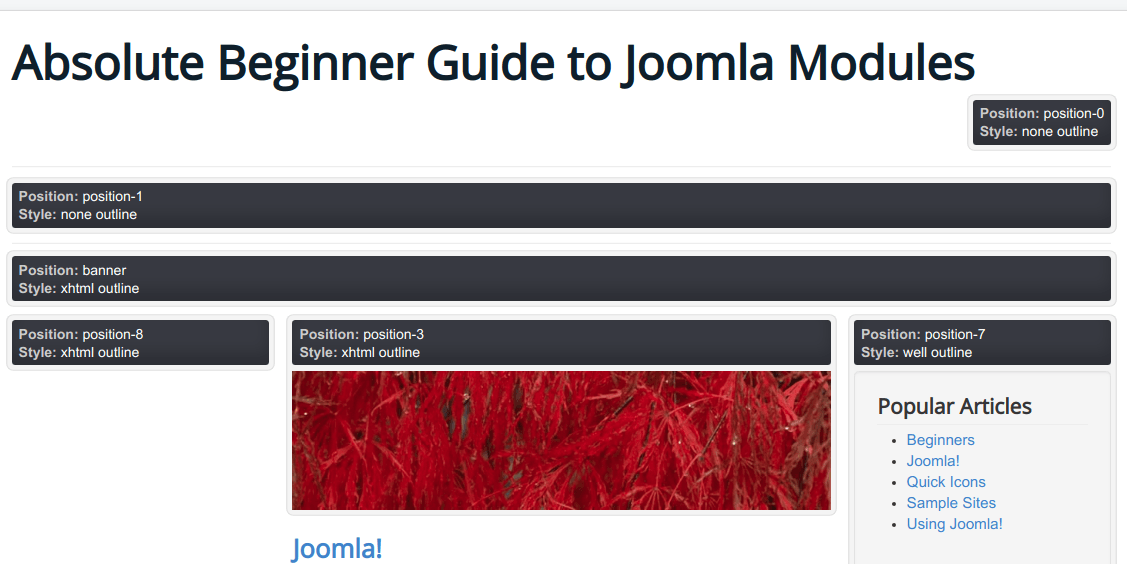
Not every template is going to have the same layout. For example, let’s look at Beez3, which is the other template provided by Joomla:
- Go back to the Templates screen.
- Click "Preview" next to Beez3 Details and Files.

- The screen below shows module positions in the Beez3 template:
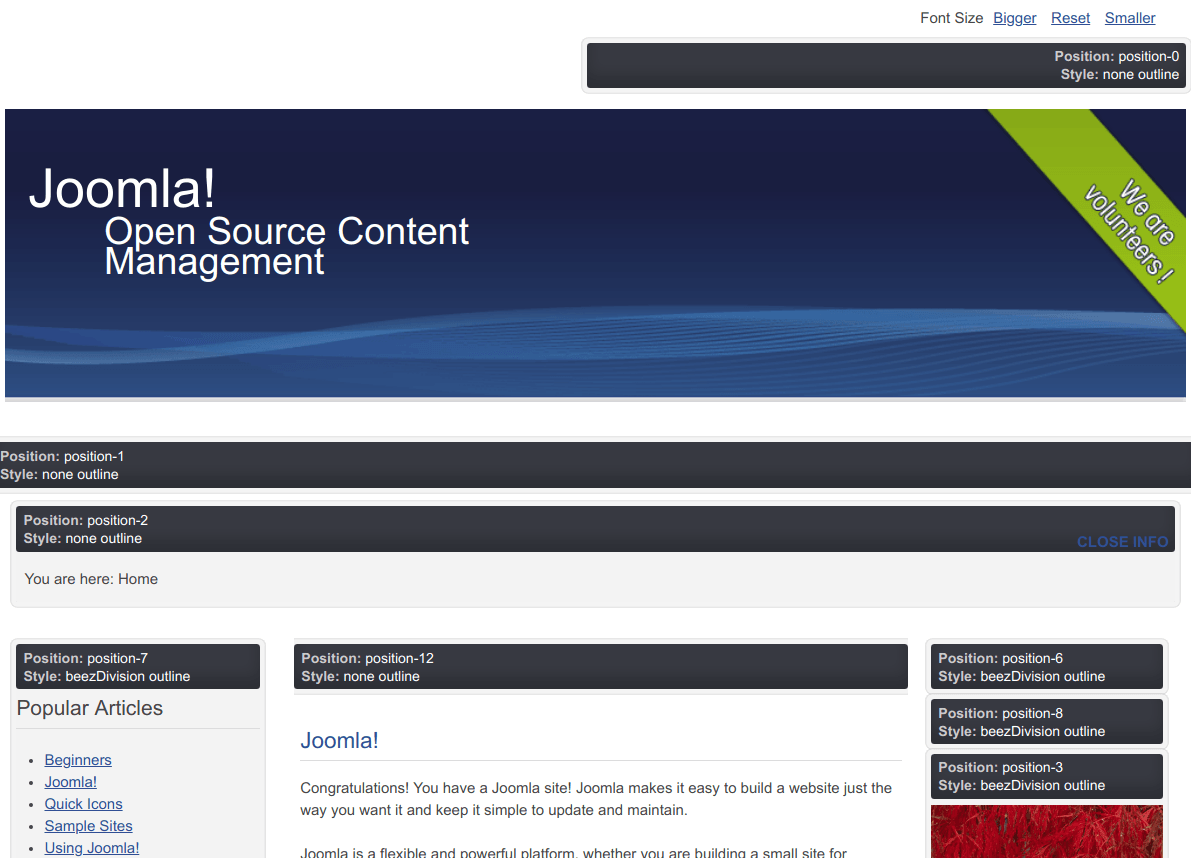
It is possible to get many more templates for Joomla. In most cases, the designer of a template will provide you with a map of the different module positions. For example, visit this page and you'll see a Joomlashack template called Unlimited.

- Click the "Module Positions" link in the menu:

- You'll see a visual explanation of module positions with live examples:

- You'll see a large image that shows each module position:
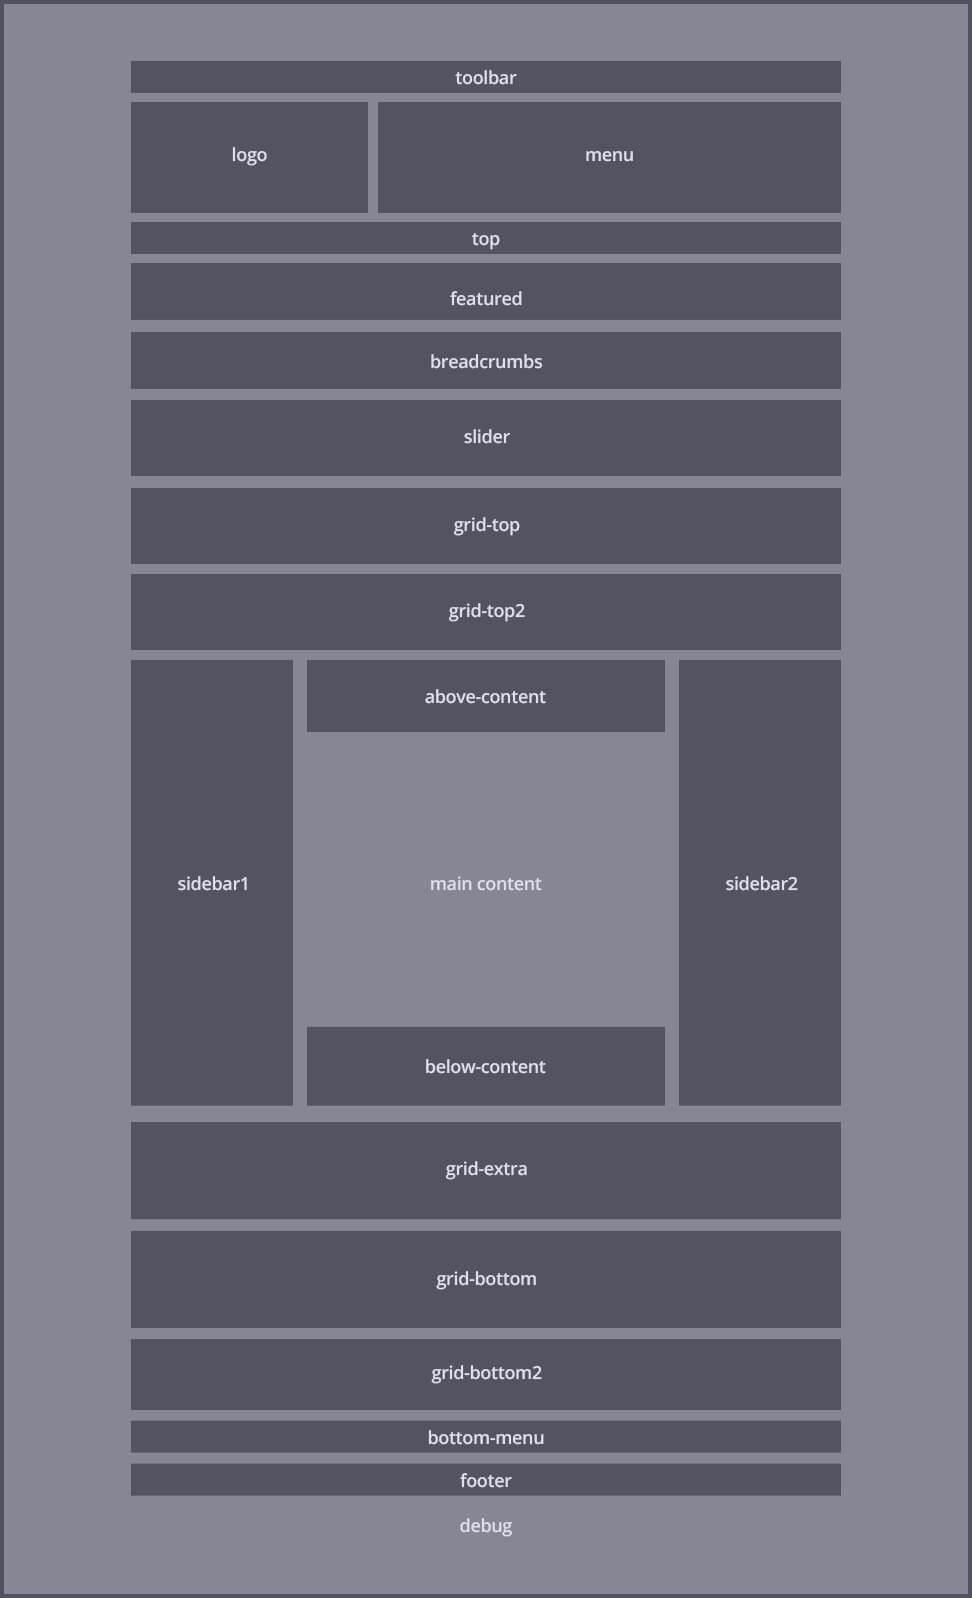
So, when you decide where to place modules on your site, it’s important to understand what positions are available to you.
Now, let’s put that new knowledge into action. Let create new modules and place them into those positions.
Creating New Modules
In Joomlashack, we’ve often talk about the CASh process, the best workflow to create content in Joomla:
- Categorize
- Add
- Show
Modules are one way you can complete part 3 of the workflow: Show. For example, you could create a module that shows a list of popular articles on your site.
This will be useful to visitors because they won’t have to go searching around to find out what’s interesting to people. Here’s how that would fit into the CASh workflow:
- Categorize: Create categories for the articles.
- Add: Create articles.
- Show: Create the Popular Articles module.
Once you installed Joomla's Sample data, you already completed Step 1 and 2. All that’s left is the “Show”.
Let’s go and create that new module to show our visitors the most popular articles.
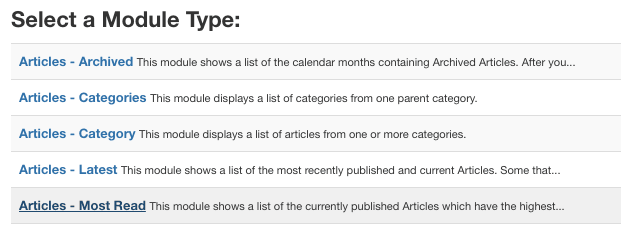
- Go to "Extensions", "Modules", and then click "New" in the top-left corner.
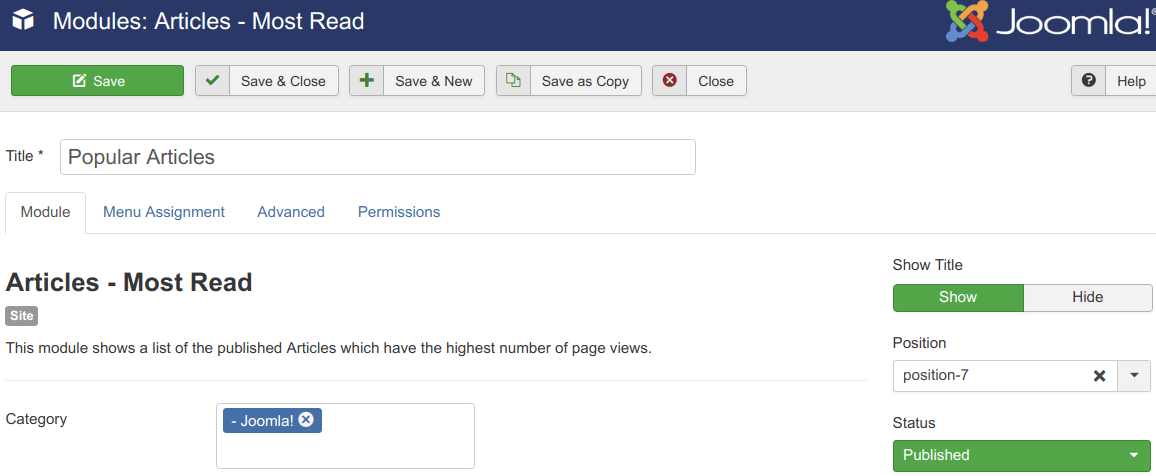
- Click "Articles - Most Read", as in the image below:
- Title: Popular Articles
- Position: Right [position-7]
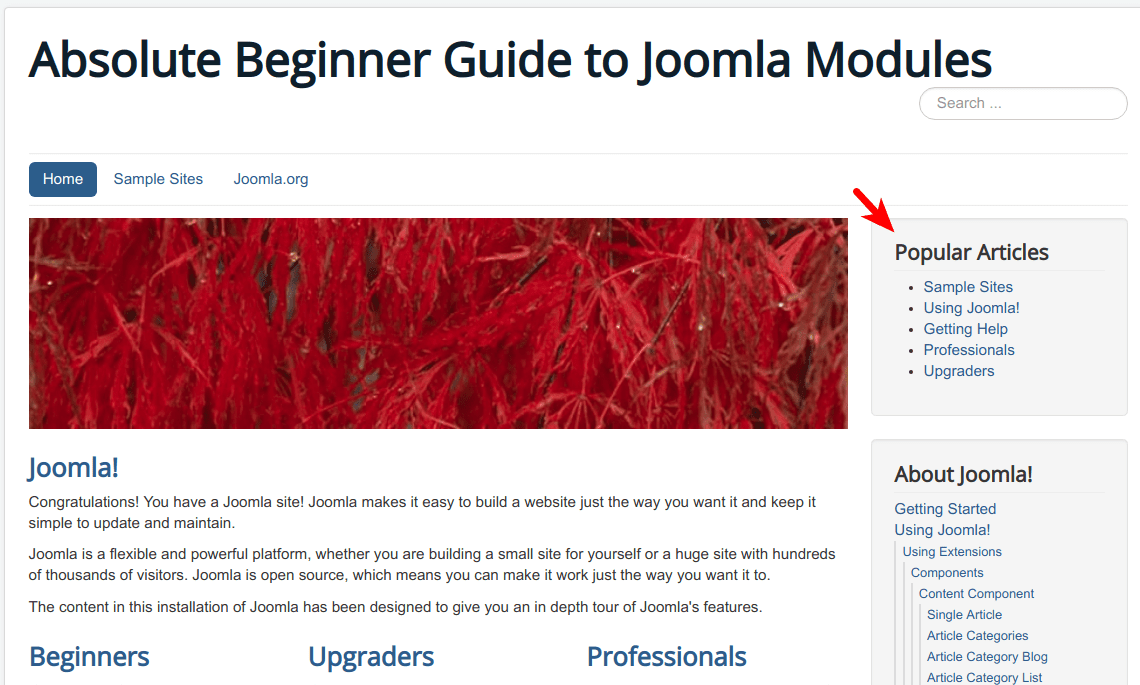
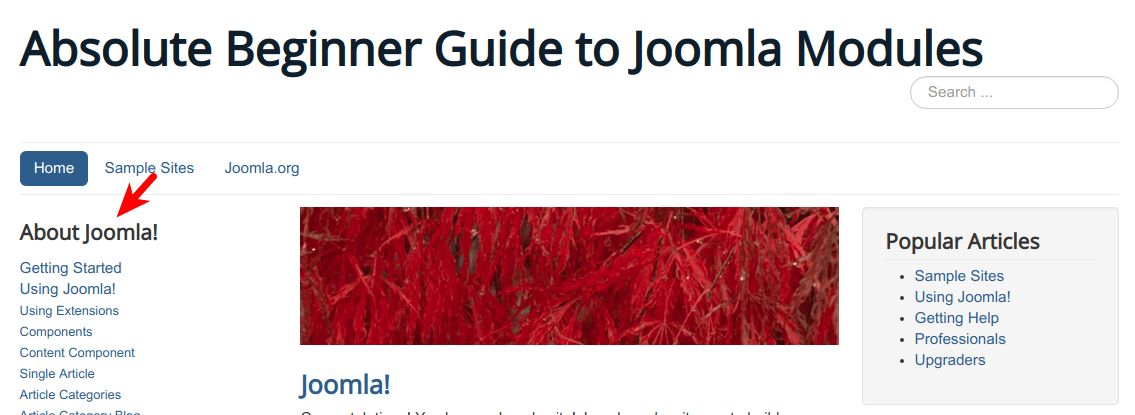
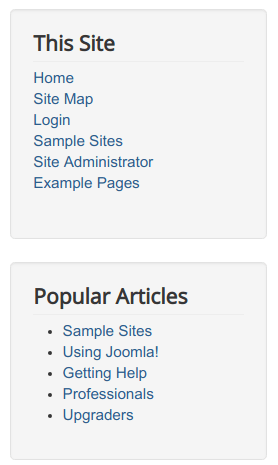
- Click "Save & Close" and then visit your site. You see your new module on your front page, as in the image below:
Hopefully, you agree the process was straightforward. We can now leave this module alone because it will update automatically, based on the number of visitors to each article.
Changing the Position and Order of Modules
As you can see, the right sidebar of our site is getting busy with four different modules:
- Popular Articles
- About Joomla
- This Site
- Login Form.
Let's clear that up and move some modules to other positions.
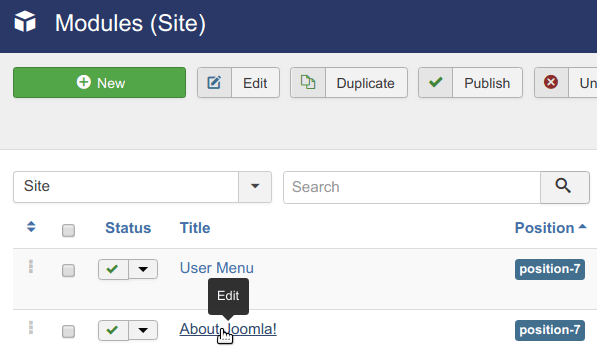
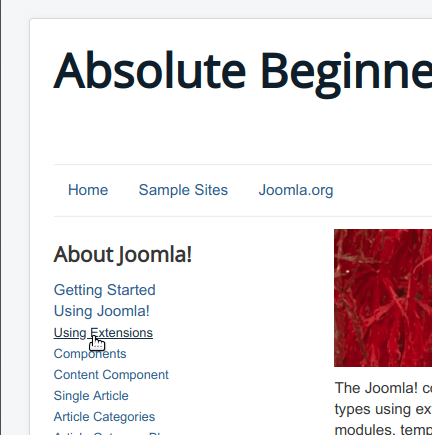
- Go to "Extensions" > "Modules", and then click "About Joomla":
- Change the Position dropdown to Left [position-8]:

- Save the module and visit your site. The "About Joomla!" module has jumped to the left sidebar:
- Notice that the design of the module has changed: different module positions do have different designs for the modules inside them.
Now you know how to create Joomla modules and place them in different positions on your site. However, can you rearrange the order of the modules when you have multiple modules in one position?
For example, you might decide that the Popular Articles module should be underneath “This Site” module in the right sidebar. Let’s see how to do that:
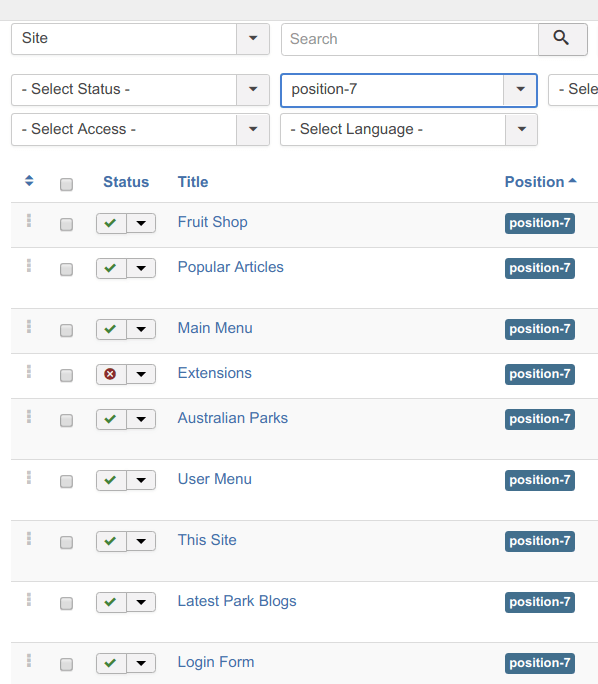
- Go to "Extensions" > "Modules". You'll see a list of all of your modules.
- Click “Search Tools”:

- In the "Select Position" dropdown, choose position-7. This will show only modules in the right sidebar.
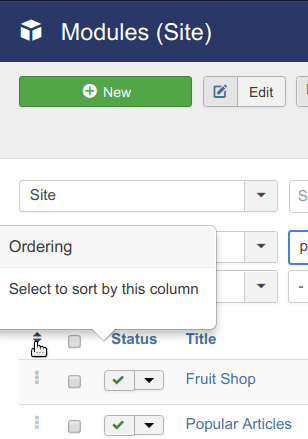
Here you can drag-and-drop them to change the order in which they will be displayed on position-7. Let’s place the Popular Article module under the “This Site” module.
- Click on the little icon with two triangles:
- You will see that the three vertical dots now changed their color from grey to black:
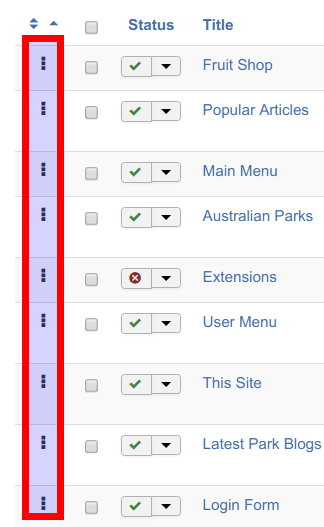
- Holding those three black vertical dots of the Popular Articles module, drag-and-drop this module right underneath the “This Site” module. The module will turn green while you are re-ordering it:
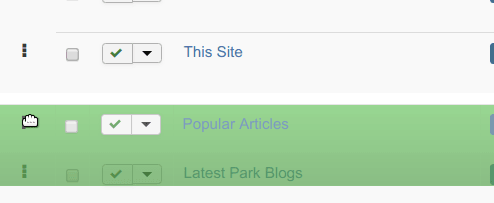
- Now go to the frontend of your site. You will see that the two modules are now displayed in their new order, just as you arranged them:
Changing Which Pages Modules Appear On
It is possible to have different modules appear when you click different menu links. Why would you want to do this?
For example, if people visit your Joomla learning demo site’s Extensions category, you can show them a module with links to the five child categories of this parent category:
- Components
- Modules
- Templates
- Languages
- Plugins.
If every module appeared on all pages, things would quickly become messy! Let’s get this done.
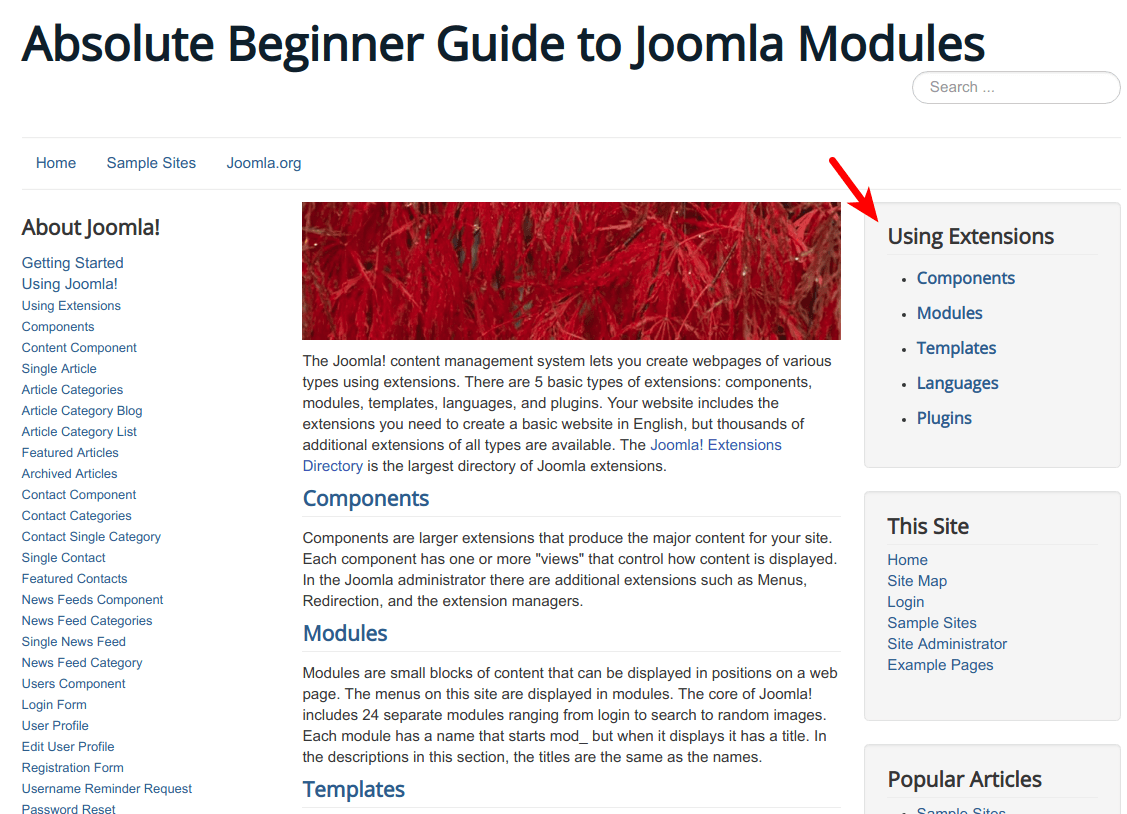
Firstly, we will make a menu module that displays links to those five child categories. Then we will make sure this module displays only for the “Using Extensions” navigation menu:
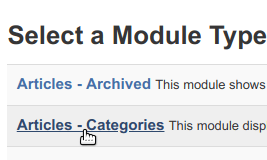
- Go to "Extensions", "Modules", and then click on "New".
- Choose "Articles Categories" as the module type:
- Title: Using Extensions
- Position: Right [position-7]
- Parent Category: Extensions
- Maximum Level Depth: 1
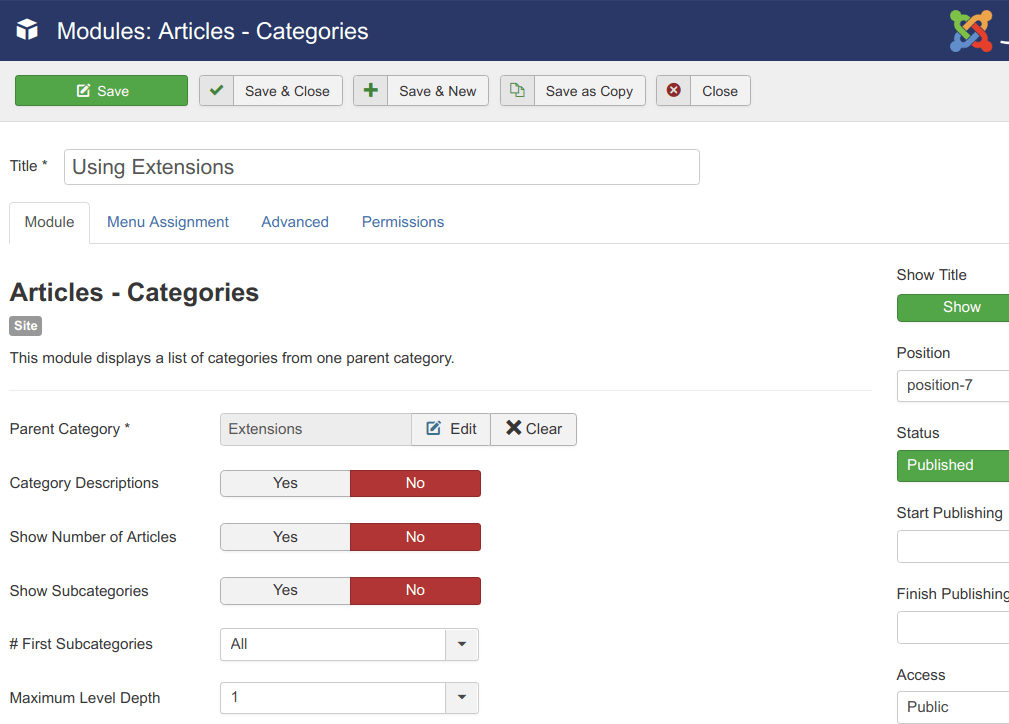
- Click Save.
Excellent! You just created the module, displaying links to child categories of the parent “Extensions” category. Next, let’s make sure this module displays only for the “Using Extensions” navigation menu.
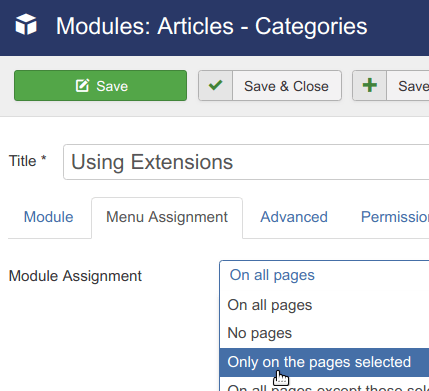
- Click on the Menu Assignment tab.
- Inside the Menu Assignment dropdown box, click “Only on the pages selected”:
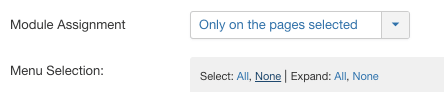
- We don’t want this module to appear on most pages, so let’s clear all of the check-boxes. Click the "None" button at the top of the menu link list, next to "Select":
- Now check the box next to “Using Extensions”:
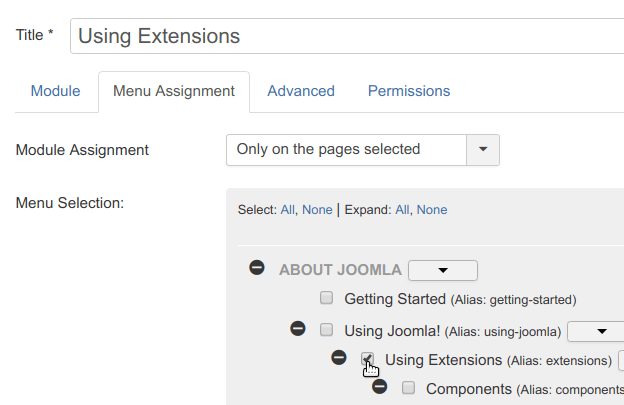
- Click "Save & Close", then visit your site and click "Using Extensions" in your “About Joomla” menu. Your new “Using Extensions” module should appear on this page and no others.
In this tutorial you’ve learned how to control where modules appear, what order they are in, and what pages they appear on:
- Position: right, left etc.
- Order: first, second, third inside their module position.
- Pages: Which menu links you click to make them appear.
Wonderful! You have practiced, and you understand three ways that you can control modules on your Joomla site.