The Joomla team have been working hard on version 4, which is likely to arrive before the end of 2020.
Here at Joomlashack, we've been writing about all the new features in Joomla 4, If you missed any of those updates, you can check out the ultimate guide to Joomla 4.
I'm going introduce you to another new Joomla 4 feature: Workflows. This new extension allows you to approve content before it's published.
Get Ready to Test Workflows
First, download the beta version of Joomla 4. You can also create a Joomla 4 beta site at https://launch.joomla.org.
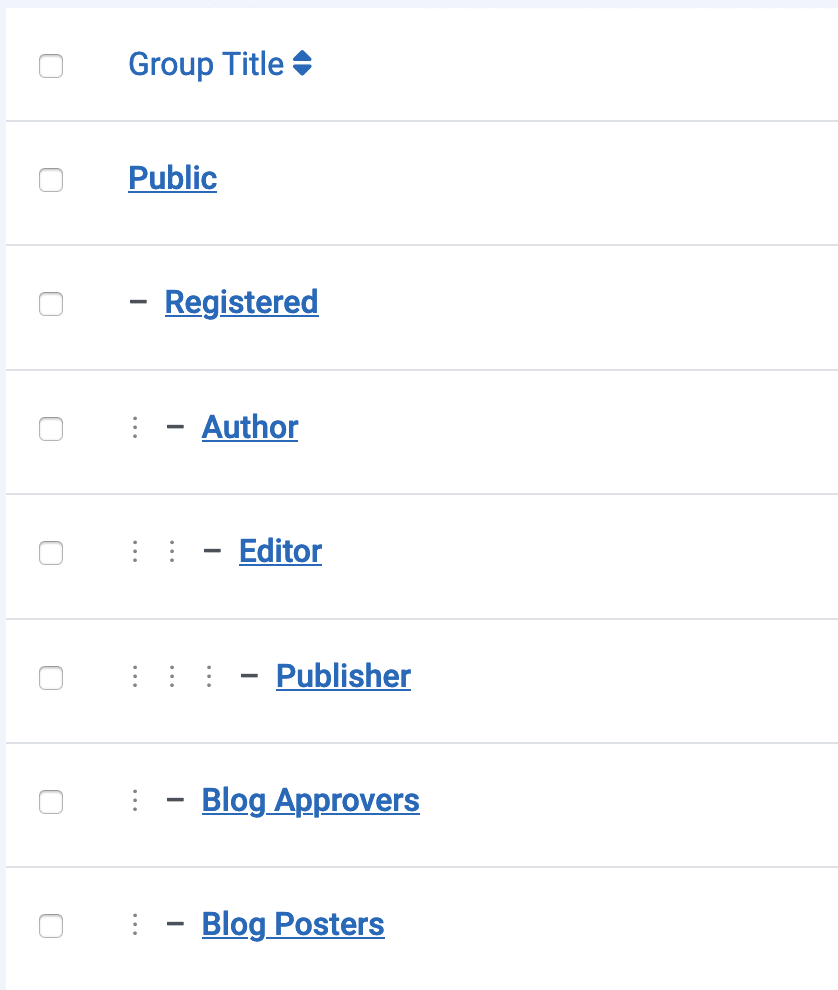
Second, go to "Users", then "Groups". Create two user groups under the "Registered" parent group. Use these names for the new groups:
- Blog Posters.
- Blog Approvers.
This image will show your "Groups" screen after saving:
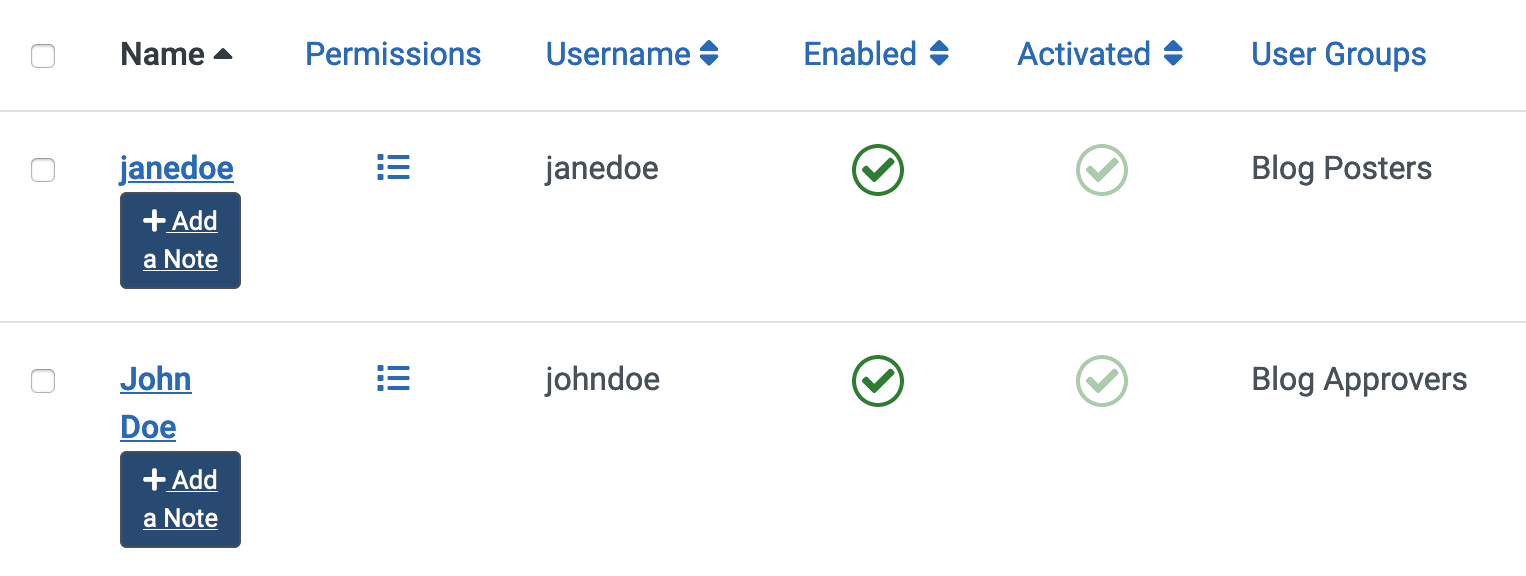
Third, we'll create two user accounts:
- Go to "Users" then "Manage".
- Create one user in the "Blog Posters" user group.
- Create one other user in the "Blog Approvers" user group.
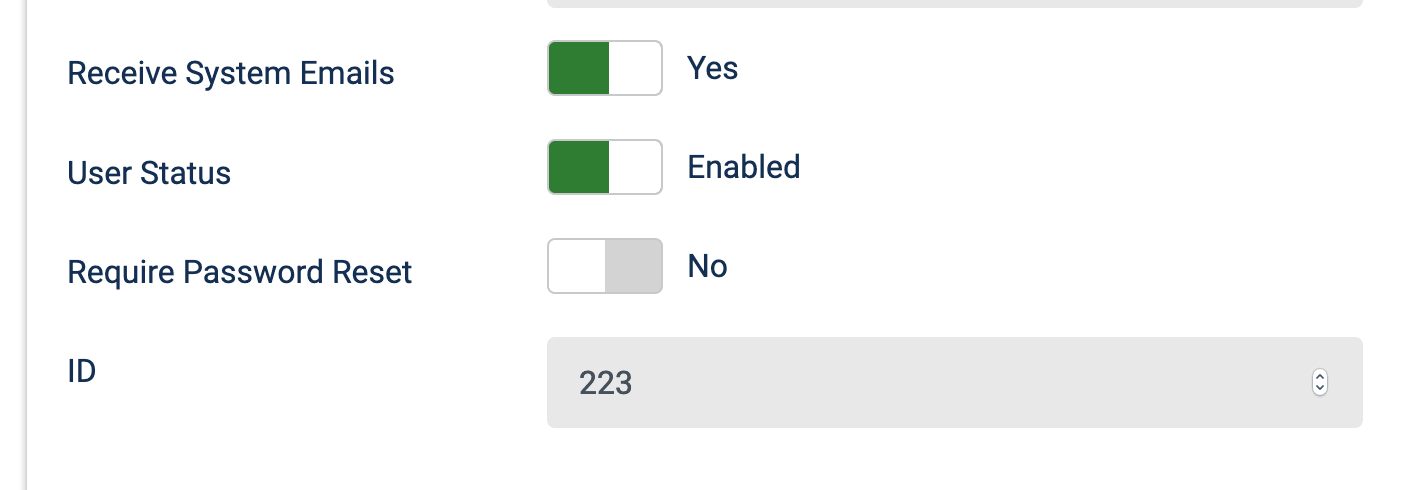
The workflow can send helpful email notifications, so I recommend you enable that feature for both users:
- Make sure the "Receive System Emails" setting is on "Yes".
Finally, it's time to create a way for users to submit articles:
- Go to "Content", then "Categories".
- Create an article category called "Blog".
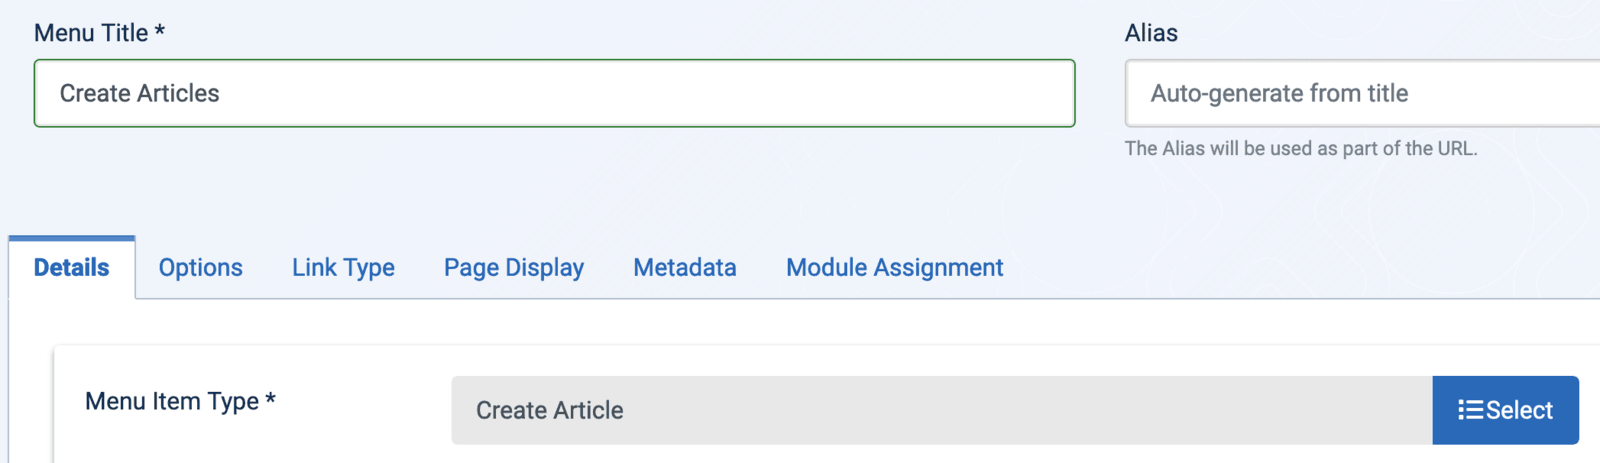
- Create a menu link using the "Menu Item Type" called "Create Article".
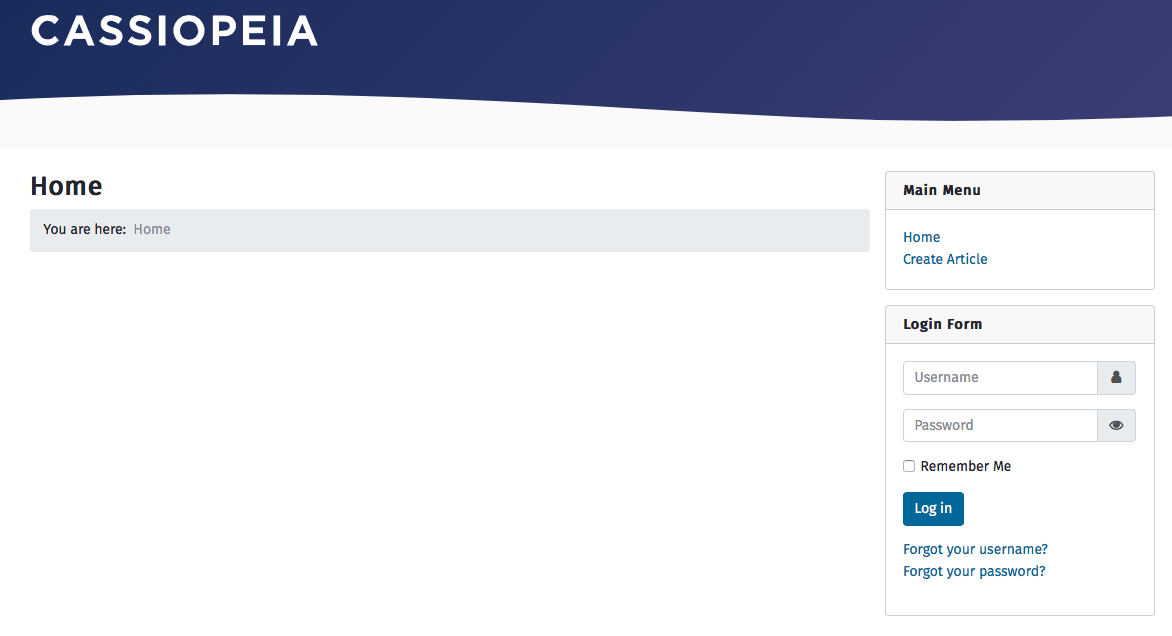
- Make sure your site has the Login module published on the front of your site, so the users can log in and submit articles.
Here's how my new Joomla 4 site looked with the "Create Article" menu link and the Login module:
About Our Publishing Workflow
For this introductory tutorial, we'll create a very basic Joomla content publishing scenario. The workflow will consist of four steps:
- Content creation: the user in the "Blog Posters" group will create blog posts.
- The Workflows component will automatically assign a new post to a publishing workflow stage. We'll call this stage, "Waiting for Approval".
- The Workflows component will email the user in the "Blog Approvers" group about the newly arrived post.
- Your Blog Approver will review and publish the post.
Let's see how to set up this work in Joomla 4 ...
Step #1. Create the Stages
This are the approval stages that your content will pass through.
- In your Joomla 4 control panel, go to "Content" then "Articles".
- Click "Options" in the top-right corner.
- Click "Integration".
- Enable the Workflow feature.
- Click "Save".

- Go to "Content", then "Workflows".
- Click the "New" button.
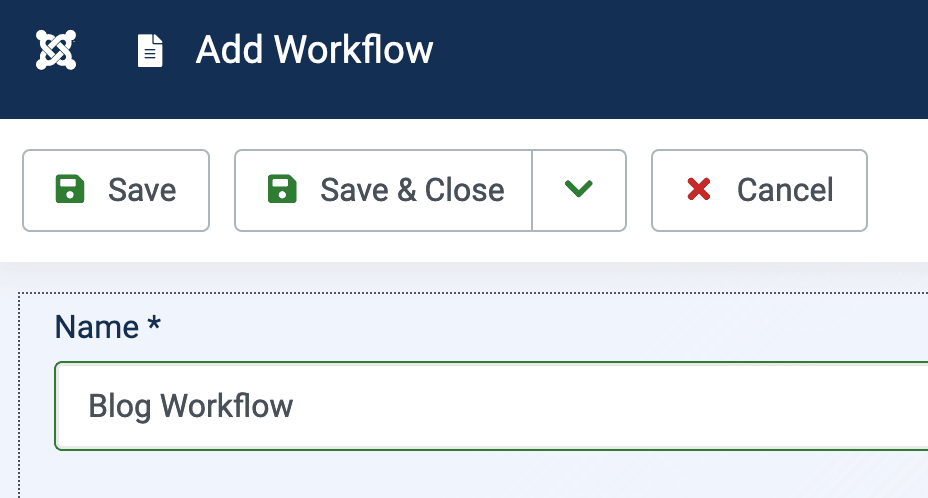
- Enter "Blog Workflow" into the "Name" field.
- Click "Save & Close".
Next, we'll create the two publishing workflow stages.
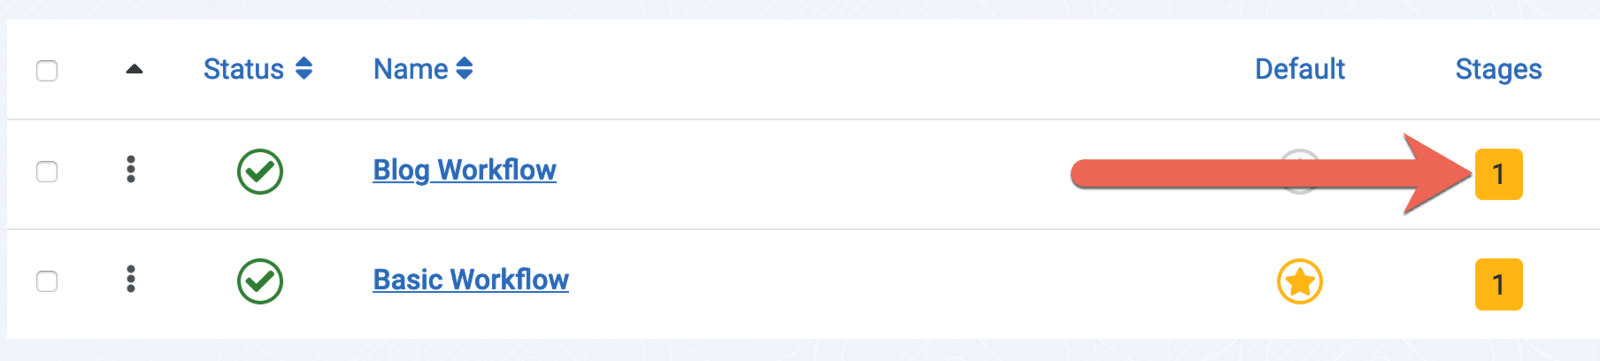
- While on the "Workflows List" screen, click on the circle with the number "1" under the "Stages" column:
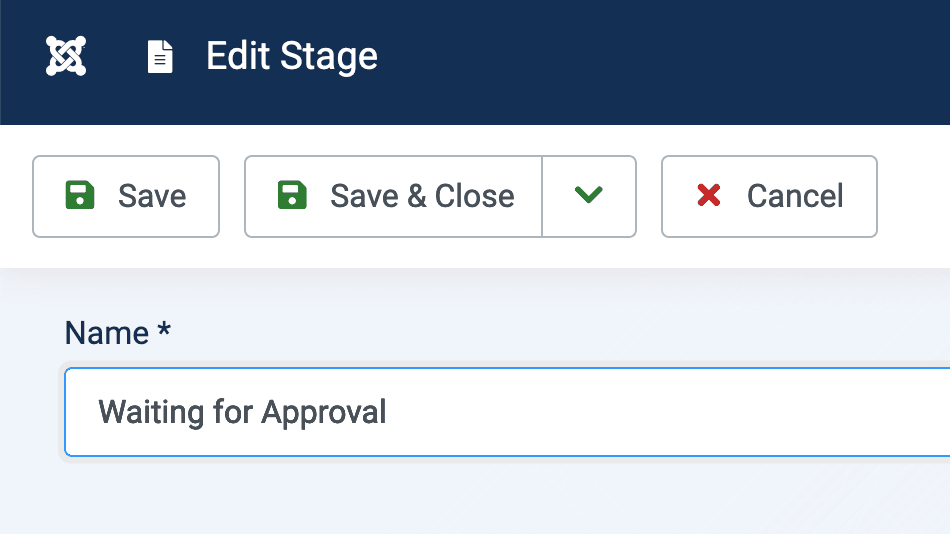
- You will arrive on the "Stages List: Blog Workflow" screen.
- There is one stage already created: "Basic Stage".
- Click on "Basic Stage" and change the name to "Waiting for Approval".
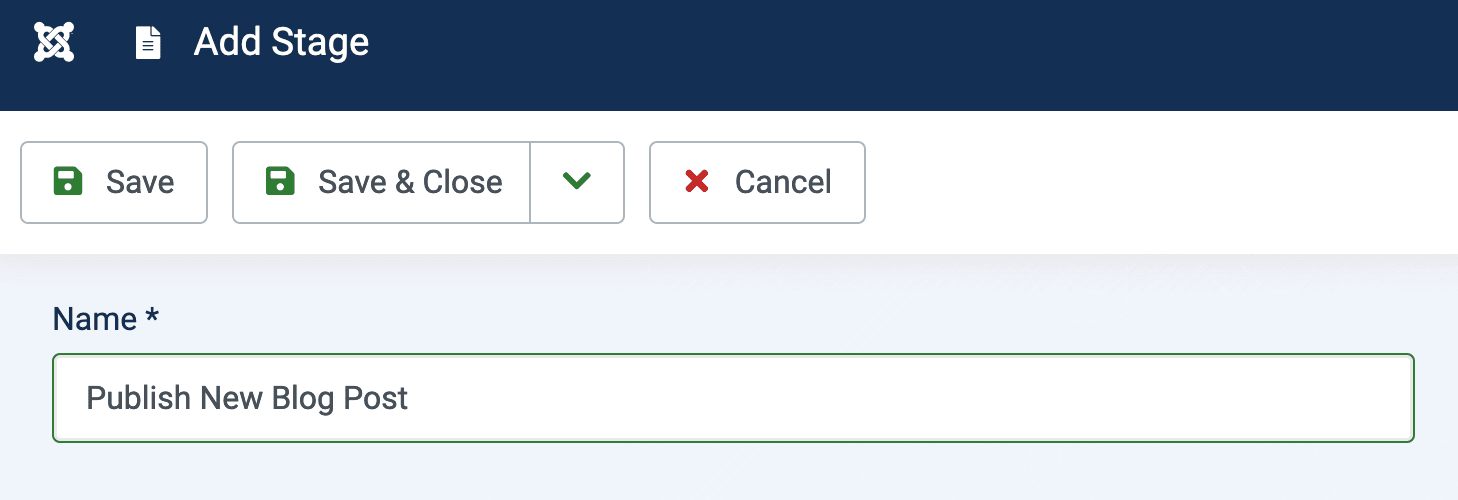
- Click the "New" button.
- Enter the name, "Publish New Blog Post".
- Click "Save & Close".
Step #2. Create the Transitions
Now we'll create what the Workflows component calls "Transitions". A transition is what moves a blog post from one Stage of the workflow to the next.
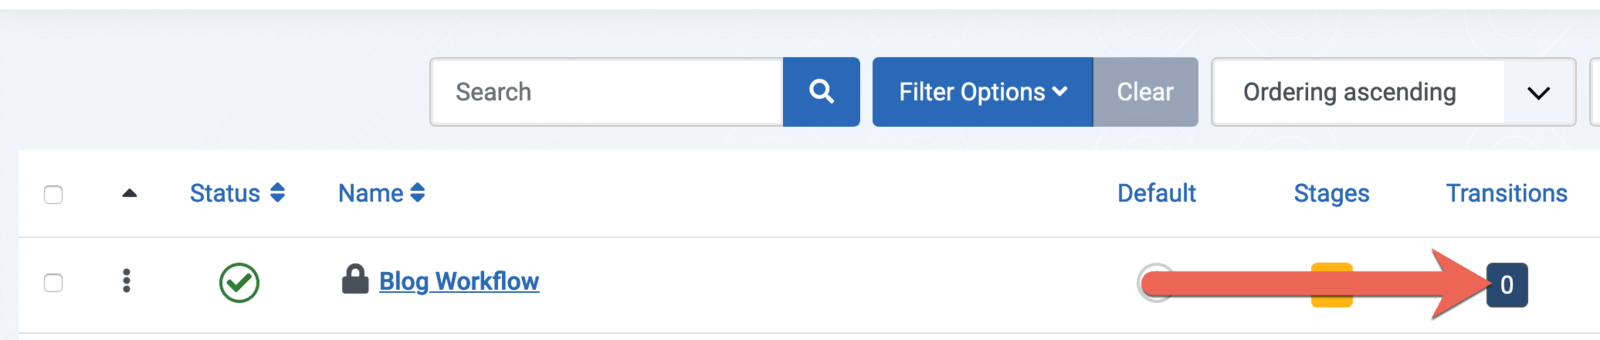
- Go to "Content", then "Workflows"
- Click the "0" icon for "Transitions".
- Click the "New" button.
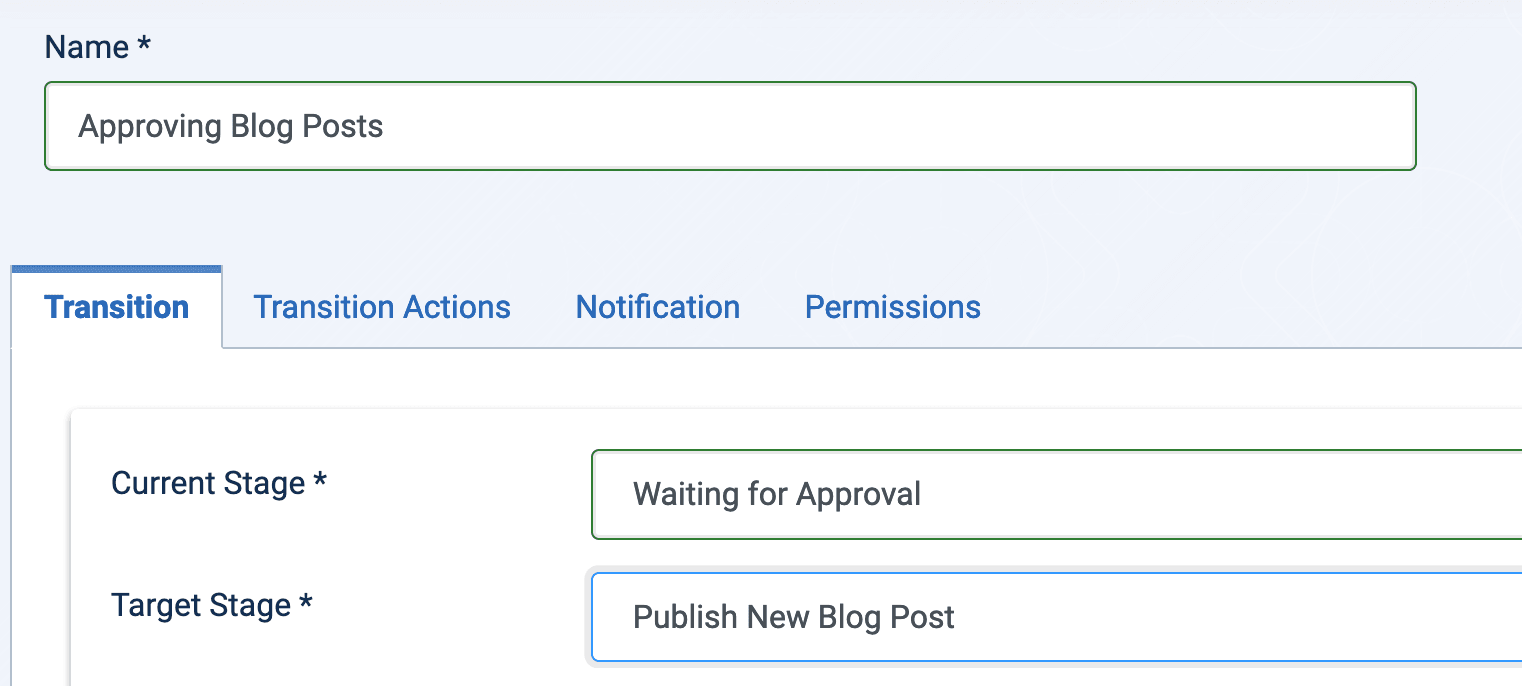
- Set the Default option to Yes.
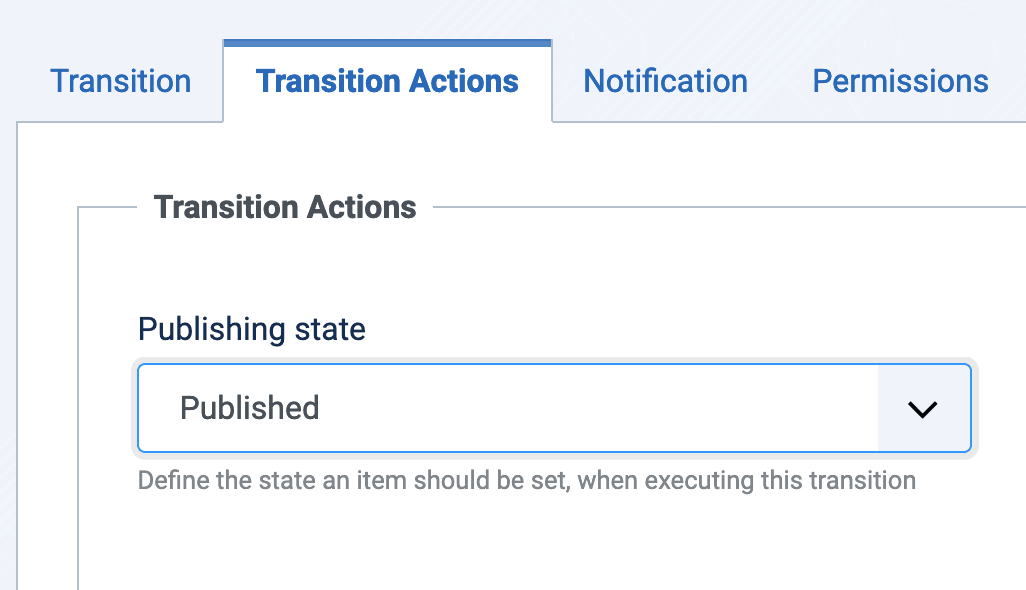
- Click Save & Close.
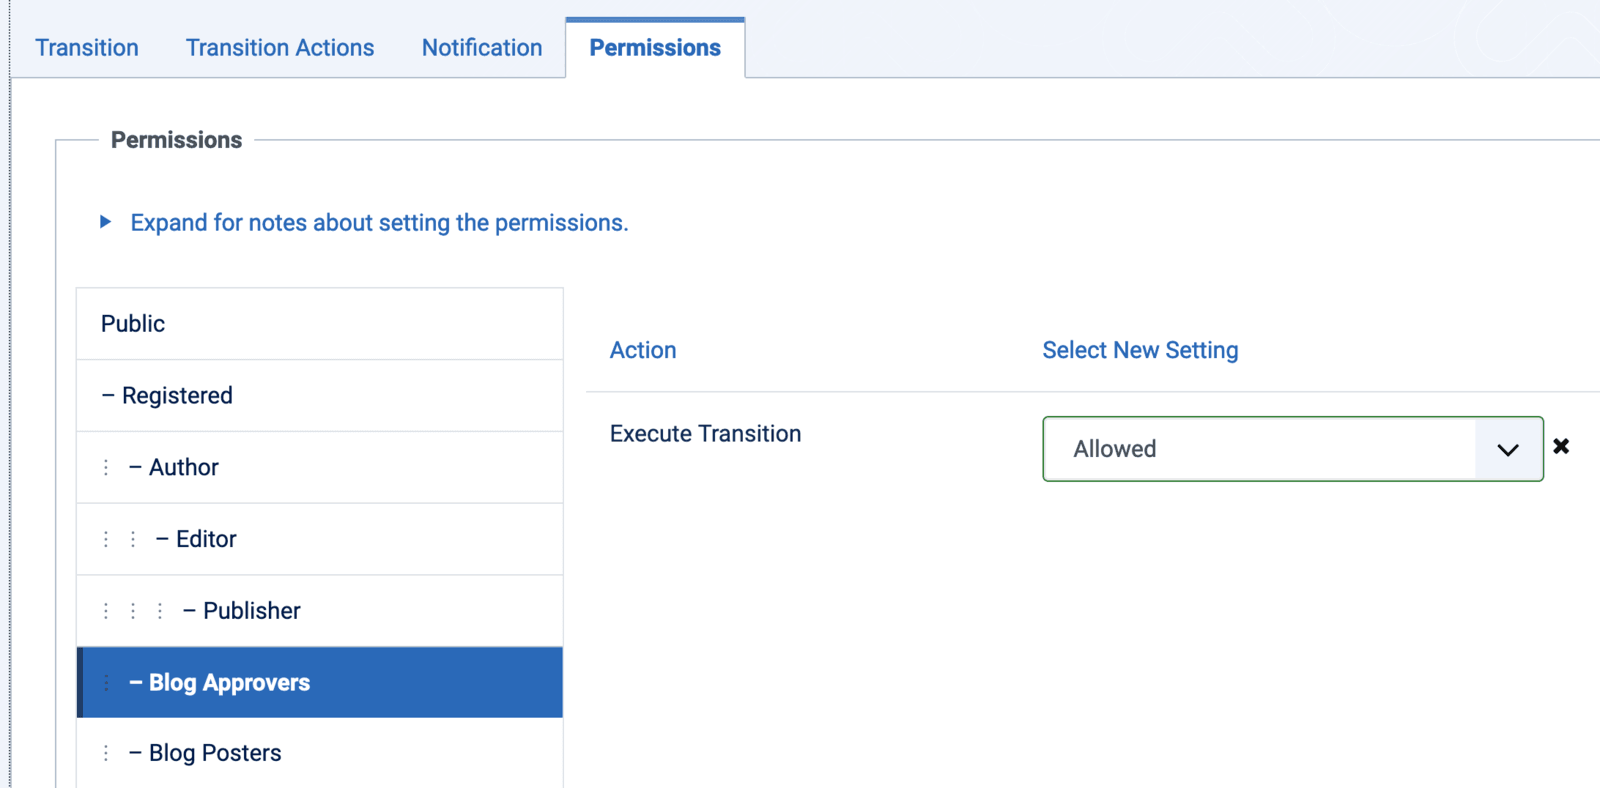
Step #3. Access Control
At this point, we have the Blog Workflow, the two stages, and the transition.
Next, let's make sure that the blogging team members have the correct content permissions.
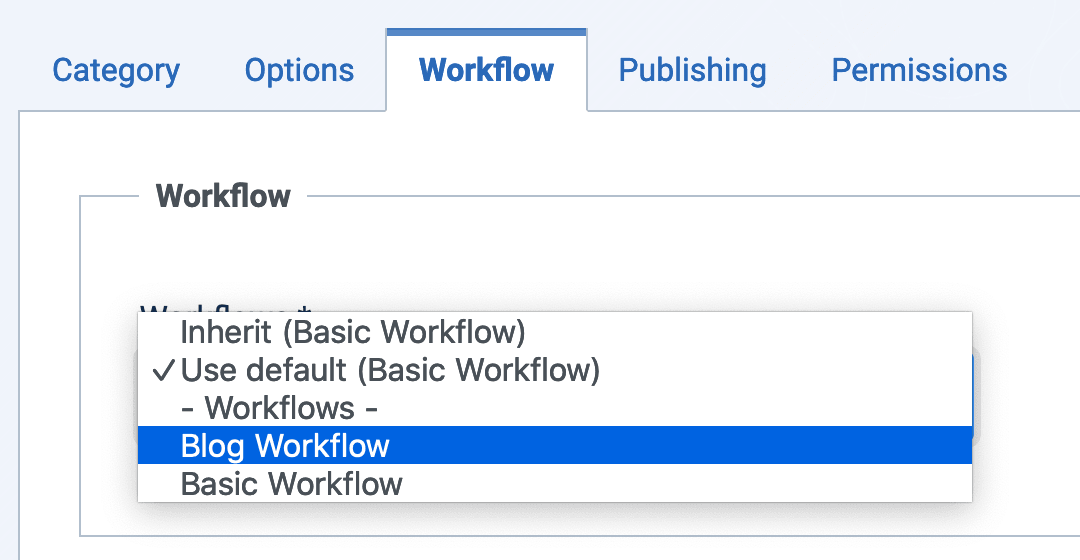
- Go to "Content", then "Categories", then "Blog".
- Under the "Workflow tab, select "Workflow":
- Go to the "Permissions" tab.
- Select "Allowed" for the "Create" and "Edit" user actions for the "Blog Posters" user group.
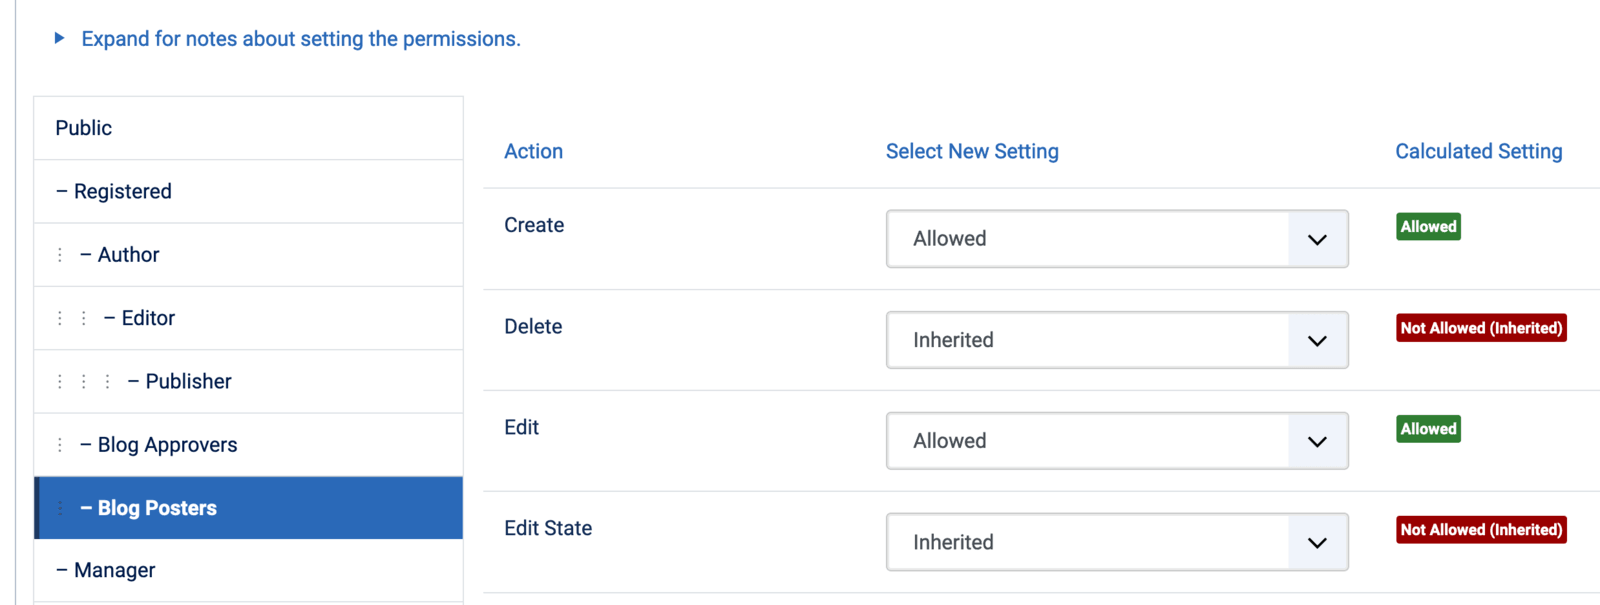
- Next, select "Allowed" for the "Delete", "Edit", "Edit State" and "Edit Own" user actions for the "Blog Approvers" user group.
- Click "Save & Close".
Step #4. Test the Workflow
Well done! You just completed your blog publishing workflow.
Now it's time to test the workflow:
- Login the front of your site as the user in the Blog Posters group.
- Click "Create Article" and submit a blog post.
- The article will get the "Waiting for Approval" status in the admin area.
- The article will also get the "Unpublished" status on the site's frontend.
- The user from the "Blog Approvers" group will get an email notification. They can now log in and publish the post.
About the Content Workflow Team
The Workflows project is the brainchild of Benjamin Trenkle from Germany.
He submitted the concept as a Google Summer of Code project in 2017. One of the students implemented the basics, working with Benjamin and four other developers as mentors. Benjamin gave this presentation about workflows at the recent JandBeyond conference:
About the author