The Joomlashack Blog
Scribe for Joomla is Released
- Written by Barrie North Barrie North
- Published: 13 May 2010 13 May 2010
Joomlashack is excited to announce the release of Scribe for Joomla.
Scribe is an SEO service that analyzes your content and tells you how you can make it better for search engines and get ranked higher.
When you install the free Scribe for Joomla extension, you can analyze your articles to improve their SEO copywriting - with the click of a button.
The analysis shows you what search engines think your article is about, and then suggests and guides you to make it better. Its like having an SEO copywriting expert standing by your shoulder, helps you optimize your content faster and easier.
Its not a tool to tweak SEF url's, its a powerful editorial assistant to help you write better copy for search engines!
Joomla People Goes Live
- Written by Barrie North Barrie North
- Published: 13 May 2010 13 May 2010
Joomla People is the latest addition to the official family of Joomla websites, a new Social Community powered by Jomsocial.
Within just a few hours of its launch today, Joomla People quickly had over 500 members register, and lots of great groups and discussions starting.
Head on over and check it out, be sure to look out for the Joomlashack Group (say hi!). You'll be able to find all of our team there, come join us!
Joomla Text Wrapping Around Images
- Written by Steve Burge Steve Burge
- Published: 13 May 2010 13 May 2010
This tutorial will show you how to get text to wrap neatly around your images inside Joomla articles.
Place Your Cursor in an Article
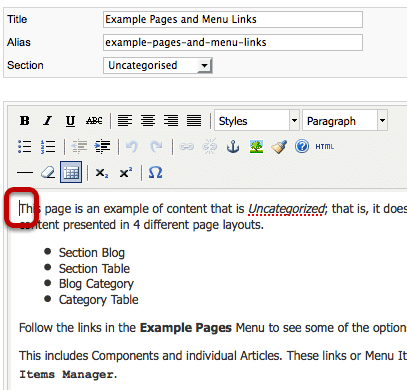
I want my image to appear at the top of the article so I'm going to place my cursor before the first text.
Use the Image Button
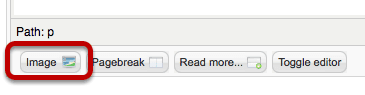
Scroll to the bottom of the article and click on the Image button
Click on an Image

Click on the image you want to use and its location should appear in the "Image URL" field. Then (and most importantly) chose either "left" or "right" from the "Align" dropdown. Finally, you can can click on "Insert".
Example of Align Right

This is what your image and text will look like if you choose "right" in the "Align" dropdown.
Example of Align Left
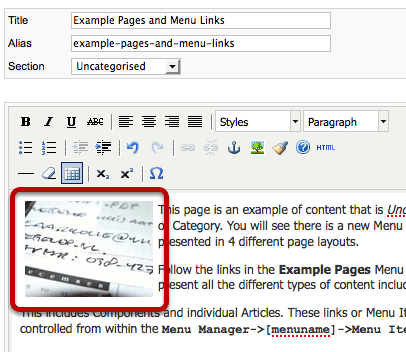
This is what your image and text will look like if you choose "left" in the "Align" dropdown.
How to Move Your Joomla! Site to a New Server
- Written by Steve Burge Steve Burge
- Published: 11 May 2010 11 May 2010
Update February 7, 2009: I have now written an an article on how to move your Joomla! 1.5 site to a new server.
Things happen. Plans change. Websites outgrow current servers and need new servers. Hosting companies provide poor service, prompting a web master to decide to change servers. Whatever the reason, you might need to move your Joomla! installation from one server to another.
If you've been running a website for a while, you have probably already accumulated quite a bit of content and several 3rd party components and/or modules, and you do not want to start fresh with a new Joomla! installation. This article explains what I did to move HowToJoomla from my test server (howtojoomla.corywebb.com) to the server that it is on now.
Add Code to Your Joomla Site Footer
- Written by Steve Burge Steve Burge
- Published: 11 May 2010 11 May 2010
This will show you how to add code to your Joomla site footer. Often websites such as Google Analytics will ask you to place code at the very bottom of the your site. They do this so that if their code doesn't load, your site still will. If the code was at the top of the site and had a problem, your whole site would go down.
Login to Your Joomla Site
Go to example.com/administrator and login to your site.
Go to the Template Manager
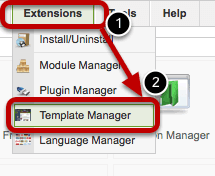
Click on "Extensions" and then "Template Manager"
Open Your Default Template
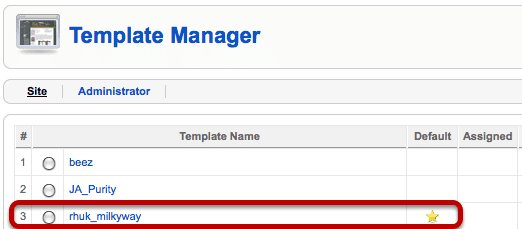
rhuk_milkyway is my default template so I'll click on that name.
Open the Template Files
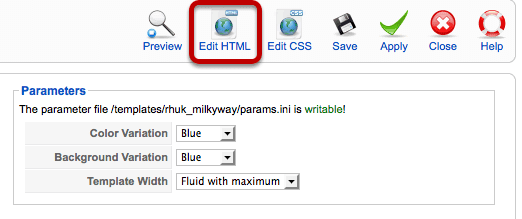
Click "Edit HTML" in the top-right corner.
Enter Your Code
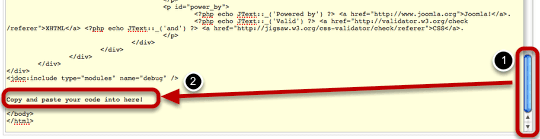
Scroll all the way to the bottom of the page and post your code right above the final lines: . Then click "Save" in the top-right corner and you'll have finished.
Adding a Joomla Template Variation
- Written by Steve Burge Steve Burge
- Published: 10 May 2010 10 May 2010
This tutorial was written for a student who wanted two copies of this template - one narrow and one wider. More advanced frameworks such as Gantry can do this, and Joomla 1.6 will be able to do it.
However, the easiest way to do this in Joomla 1.5 is to make two copies of your template that you can modify separately. Here's how to do it:
Login to Your Hosting Account

You can login via your hosting company's site or you could go via FTP. Essentially you just need a way to get to your files.
Find Your File Manager
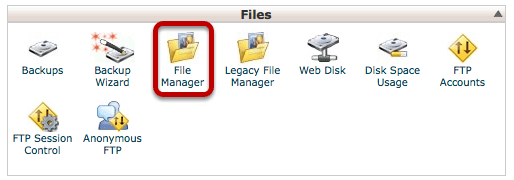
Every hosting company should give you access to your files, althought the access may be in different places with each host. This is an example from the popular CPanel software.
Find Your Templates Folder

We're going to open up the folder that contains our templates.
Copy Your Template

Select the "rhuk_milkyway" folder and click "Copy"
Choose a New Template Folder Name
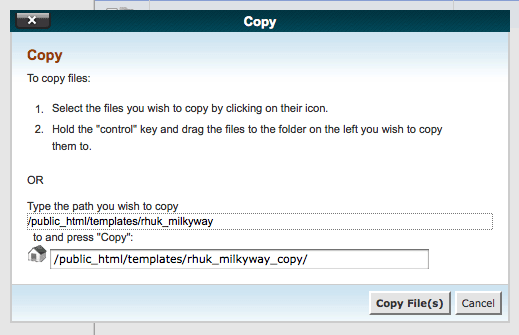
Choose a new name for the folder. In this case, I'm simply going to call it "rhuk_milkyway_copy" and click "Copy File(s)"
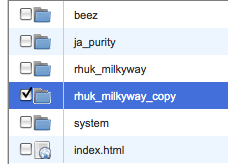
Open Up Your New Template Folder
Open Up the templateDetails.xml File
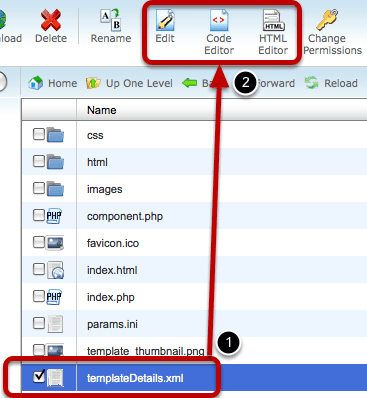
Check the box next to "templateDetails.xml" and select any of the editing options. templateDetails.xml is the table of contents for our template and contains all of the identifying information that Joomla needs.
Change the template name
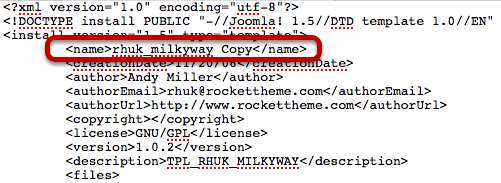
Inside the fields, change the name of the template to something that clearly identifies it as a copy.
Access Your Template Manager
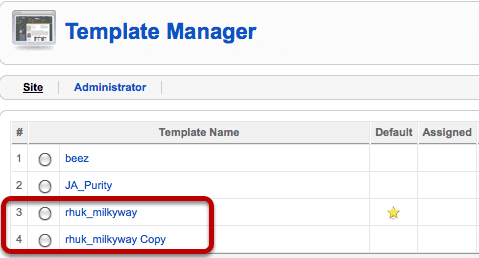
Now if you go to Administrator >> Extensions >> Template Manager you should see the two copies of the same template.
Move a Joomla Site from Test Directory to Live
- Written by Steve Burge Steve Burge
- Published: 06 May 2010 06 May 2010
This tutorial will show you how to move a Joomla site from one directory to another using CPanel. One common reason for doing this is to move Joomla from a test folder and make it live. Joomla 1.5 makes this process very easy.
Login into your CPanel
Often you can access your CPanel just by adding /cpanel to your domain name ... example.com/cpanel
Access the File Manager
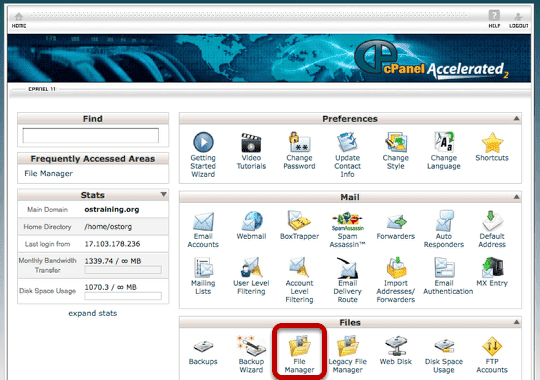
Although your screen may not look 100% identical to the one above, every version of Cpanel does come with a "File Manger" option somewhere.
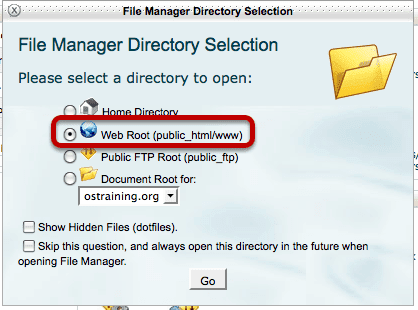
Choose to Go to the Webroot
Open Your Test Folder
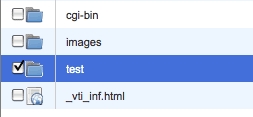
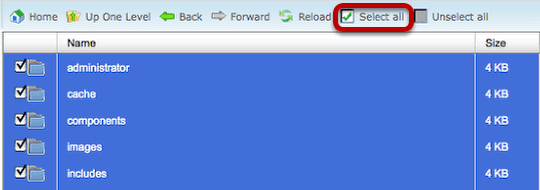
Select All the Files
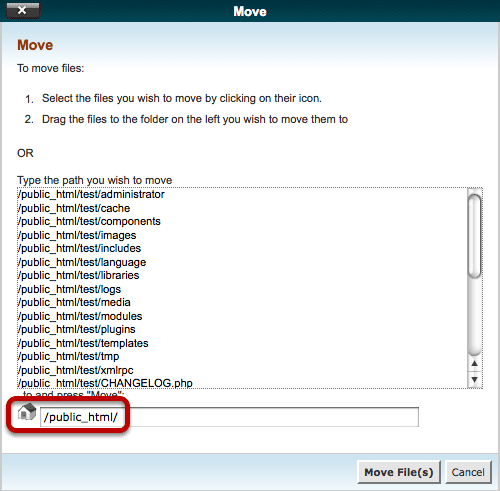
Click on Move File
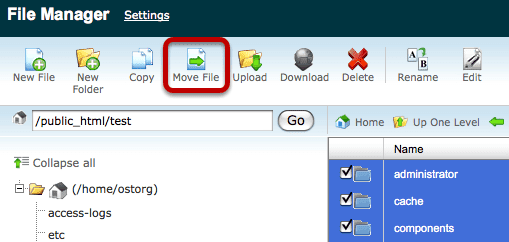
Move to /public_html/
Check Your Site
Visit the front of your site in its new location and verify that everything is working correctly.
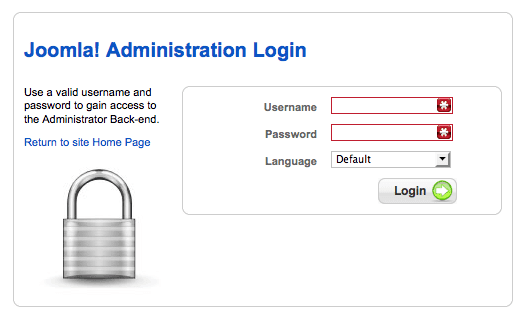
Login to Your Joomla Site Administrator
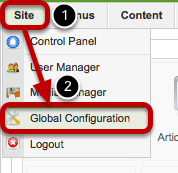
Go to Site >> Global Configuration
Change Path to Log folder
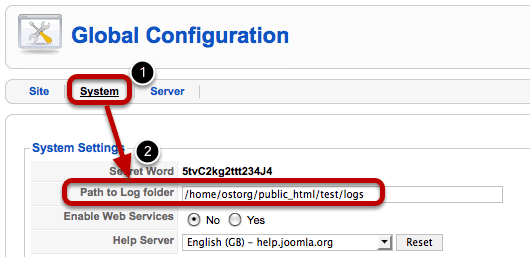
Change that setting to remove your /test/ folder
Change Path to Temp-folder
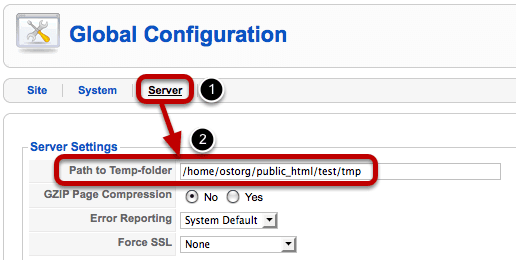
Change that setting to remove your /test/ folder. Click "Save" in the top-right corner.
Find the Right Width for Your Site
- Written by Steve Burge Steve Burge
- Published: 01 May 2010 01 May 2010
This tutorial will show you how to find the right width for your site.
Find Your Own Screen Width
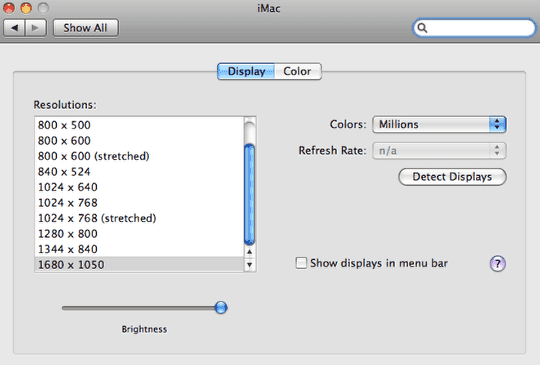
First, we'll find the current width of your screen so you can have an idea of how large these sizes are. Most of the time it will be in your computer settings:
- For my Mac its Apple icon >> System Preferences >> Displays
- For my PC its Start >> Control Panel >> Display >> Settings
In this case my screen is 1680x1050.
Find Your Visitors Most Common Screen Sizes
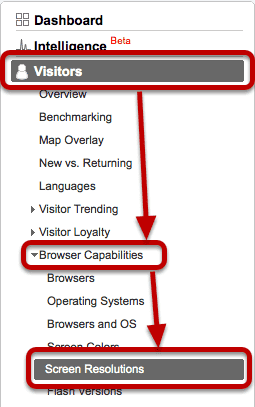
Your own screen probably isn't the best width to use. I'd go to Google Analytics and check what the most common screen sizes are for your site visitors. Go to Visitors >> Browser Capabilities >> Screen Resolutions.
Examine the Screen Sizes
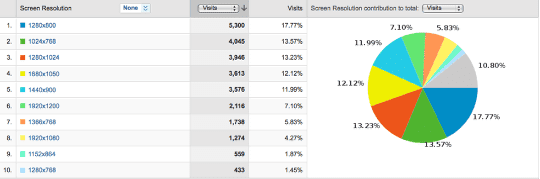
Generally the more tech-savvy your visitors, the large the screen. In this case it wouldn't make much sense to have a narrow website width. Ideally our site will be at least close to 1000px. Increasingly widths of around 960px are common.
New Joomla SEO extension from Joomlashack
- Written by Barrie North Barrie North
- Published: 01 May 2010 01 May 2010
Find out more about Joomlashack's new Joomla SEO extension.
In 2 weeks we'll be releasing a new Joomla SEO extension that will revolutionize how you think about SEO and your Joomla website. Its finally going to bury SEO misunderstandings and lift Joomla to its rightful place when people think of Joomla and search engine optimization.
How do you set up SEO optimized Websites? Do you want to learn SEO? Would be interested in SEO lessons? SEO Courses? SEO video tutorials? SEO Training? Conversion optimization lessons? Conversion optimization courses. Conversion optimization video tutorials. Conversion optimization training.
404 Not Found in Joomla Administrator - JSecure
- Written by Steve Burge Steve Burge
- Published: 30 April 2010 30 April 2010
This is one common solution if you're getting a "404 Not Found" error when visiting your Joomla administrator area. The problem often lies with a good and useful product called JSecure. You normally have to remember a specific URL that was set in the administrator area. For example: mysite.com/administrator?mysecretcode. This stops people from trying to guess your login, but if you forget your secret code ...
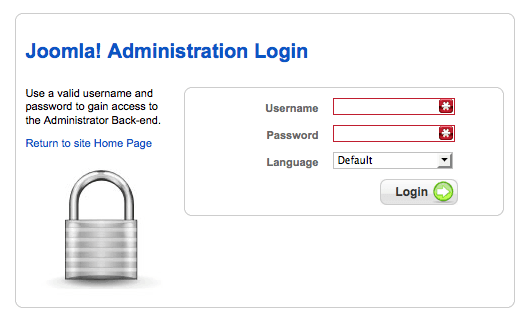
Do you see this screen?

If you do, the problem is JSecure. Have you really forgotten your secret code? If so, read on ...
Login to Your Hosting Account
Or you could go via FTP. Essentially you just need a way to get to your files.
Find Your File Manager
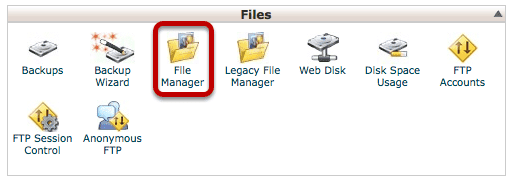
Every hosting company should give you access to your files, although the access may be in different places with each host. This is an example from the popular CPanel software.
Browse to /Plugins/System/
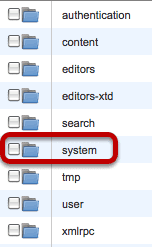
You need to access the /plugins/ folder than then the /system/ folder.
Find JSecure.php
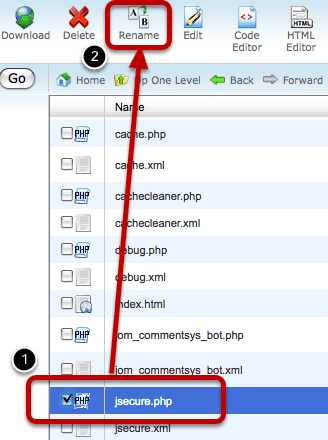
Rename the File
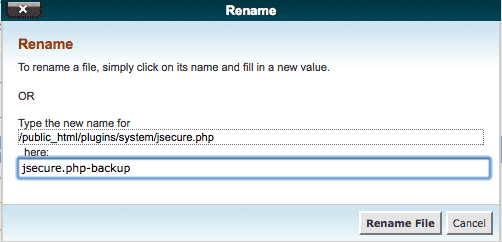
Just give jsecure.php a different name and save it. Next time to try to access your site, the 404 error should have gone.