The Joomlashack Blog
Change Joomla htaccess.txt file to .htaccess with CPanel
- Written by Steve Burge Steve Burge
- Published: 24 April 2010 24 April 2010
Changing your htaccess.txt file to .htaccess is important in Joomla because it allows you to enable Search Engine Friendly URLs. It's also an important step to help keep your site safe. Here's how to do it.
Login into your CPanel
Often you can access your CPanel just by adding /cpanel to your domain name ... example.com/cpanel
Access the File Manager
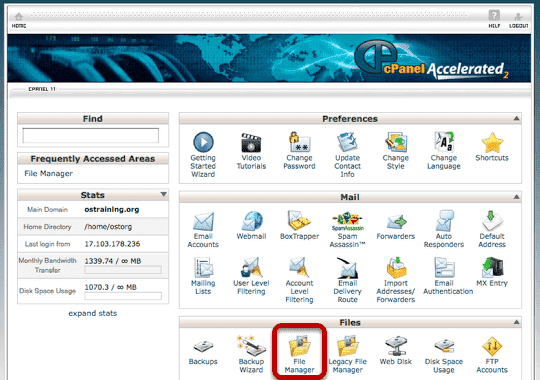
Although your screen may not look 100% identical to the one above, every version of Cpanel does come with a "File Manger" option somewhere.
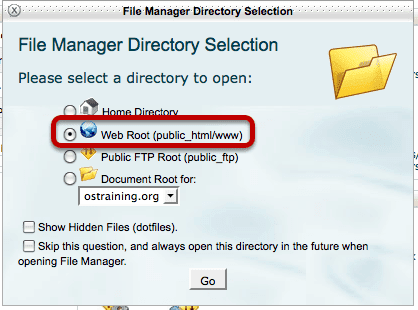
Choose to Go to the Webroot
Find htaccess.txt
Your files and folders will be listed alphabetically. Scroll down until you find htaccess.txt
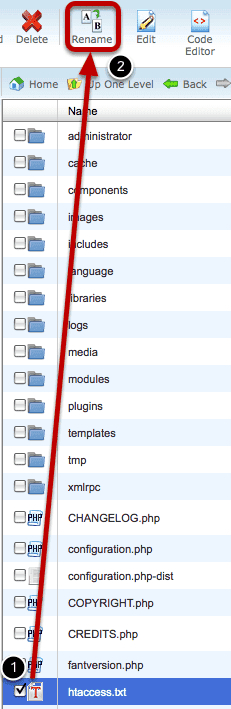
Check the box next to htaccess.txt and click "Rename" at the top of the page.
Change the file name to .htaccess
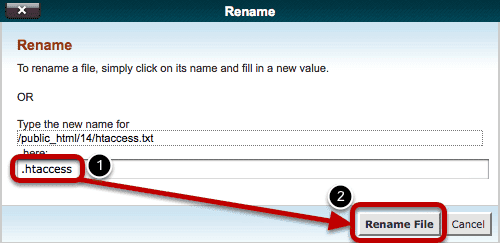
Enter .htaccess as the new file name and click "Rename File"
Showing a Google Calendar Inside Joomla
- Written by Ed Andrea Ed Andrea
- Published: 23 April 2010 23 April 2010
This tutorial will show you how to display a Google Calendar inside your Joomla website.
Go to Your Google Calendar
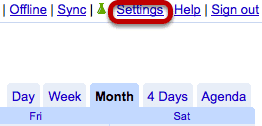
Go https://www.google.com/calendar, login and and click "Settings" in the top-right corner.
Find the Calendar ID
Click on "Calendars" and then click on the name of your calendar. Scroll down to "Calendar Address" and copy the "Calendar ID" to your notepad. It will have a long string of characters and then @group.calendar.google.com
Make the Calendar Public
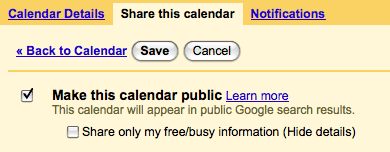
Click "Share This Calendar", check the box next to "Make this calendar public" and click "Save".
Download the GCalendar Component
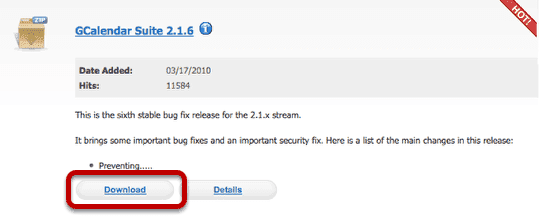
Now that you have your Google Calendar set up correctly, we're going to install the necessary Joomla component. Visit https://g4j.laoneo.net to download the GCalendar component
Extract the GCalendar Folder
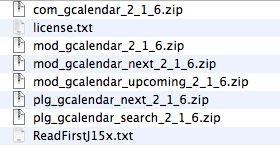
Click on the GCalendar folder and extract it so you can see the various extensions inside.
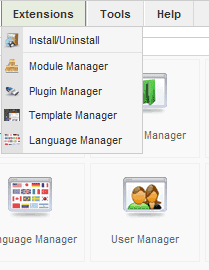
Install GCalendar

Go to Extensions >> Install/Uninstall and click "Browse" to upload com_gcalendar
Go to the GCalendar Component
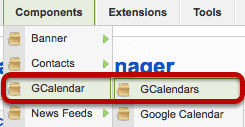
Go to Components >> GCalendar >> GCalendars
Creating a New Calendar
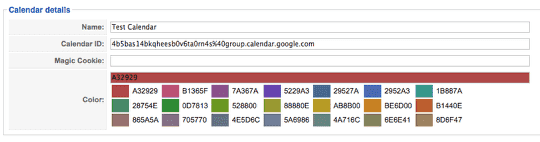
Click "New" in the top-right corner. You'll see three fields. You only need to give the calendar a title and enter the "Calendar ID" you found and saved earlier. Click "Save"
Make a Menu Link to the Calendar
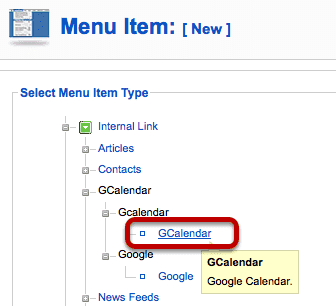
Go to Menus >> Main Menu >> click "New" >> choose "GCalendar"
Choose the Calendar
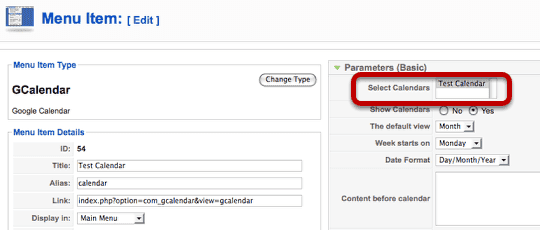
Choose the calendar you created and click "Save".
Your Calendar Should Be Ready ...

Using Docman to Handle Documents in Joomla
- Written by Steve Burge Steve Burge
- Published: 23 April 2010 23 April 2010
Docman is perhaps the most popular way to handle documents in Joomla. This tutorial will show you how to use it.
Download Docman
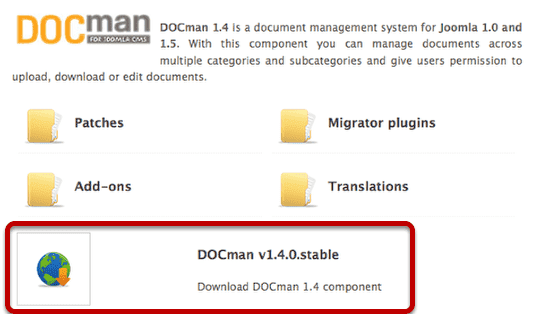
Visit https://www.joomlatools.eu/docman-14.html and download Docman v1.4.0. There is a more modern version of Docman that is commercial. We're using the free version in this tutorial.
Enable the Legacy Plugin
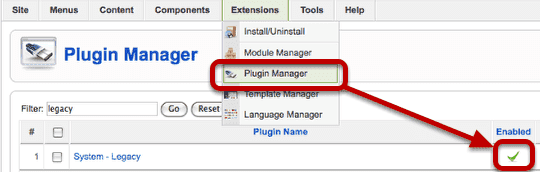
Login to the administrator area of your Joomla site and go to Extensions >> Plugin Manager. Click to enable the "System - Legacy" plugin.
Install Docman
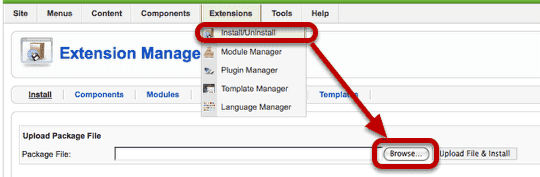
Go to Extensions >> Install/Uninstall and click "Browse" to upload Docman
Add a New Category
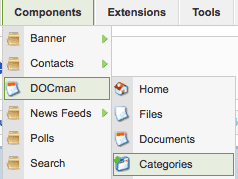
Go to Components >> Docman >> Categories and click "New" in the top-right corner.
Name and Save the Category
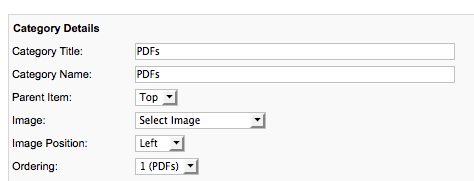
Give your new category a name and click "Save" in the top-right corner.
Start Uploading Documents

Click "Files" and then "Upload" in the top-right corner.
Choose Upload Option
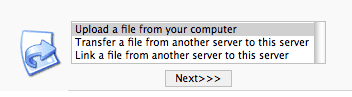
Normally you'll want to keep this option as it is and just click "Next>>>"
Upload Your File

Browse to find your file and then click "Submit"
Choose to Make a New Document
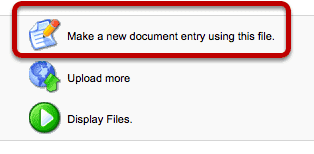
Once you have uploaded your file, the next step is to create a "Document" out of it. That simply means giving it a name, description and other details. Click "Make a new document entry using this file."
Add Details to the Document
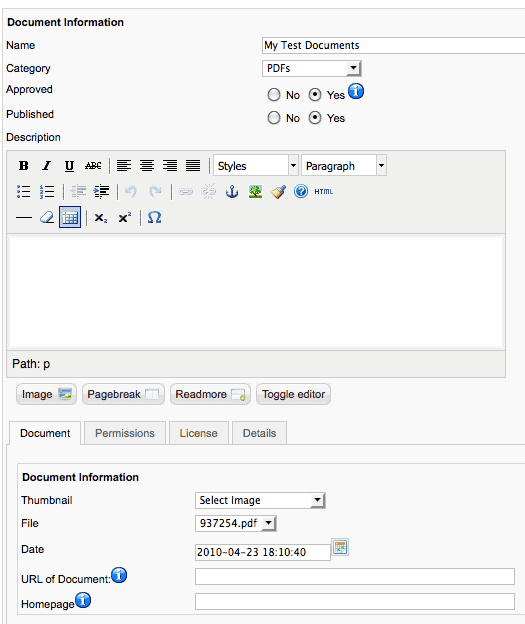
Make sure that both "Approved" and "Published" are set to "Yes". Then click "Save".
Verify that Your Document is Created

Hopefully your new document will appear as above.
Make a Menu Link to Docman
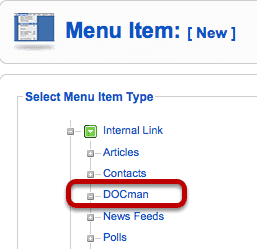
Go to Menus >> Main Menu >> click on "New" >> choose "Docman". Choose a title for your menu link and click "Save".
View Docman On the Front of Your Site
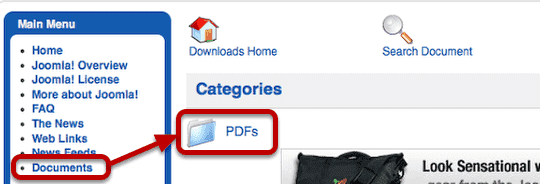
Click "Preview" in the top-right corner and you'll see your new menu link. Click on it and you'll see your Docman category. Open the category to see your file
Extra Feature: Docman Groups
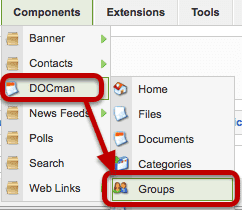
Docman also has a very powerful permissions system that allows you to control who can and cannot access documents. Start by going to Components >> Docman >> Groups
Creating a Docman Group
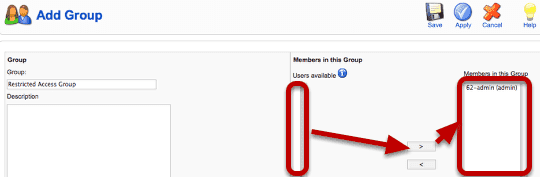
Click "Add" in the top-right corner". You can create a group of users simply by moving them from the "users available" list to the "Members in this Group" list.
Giving Groups Access to a Document
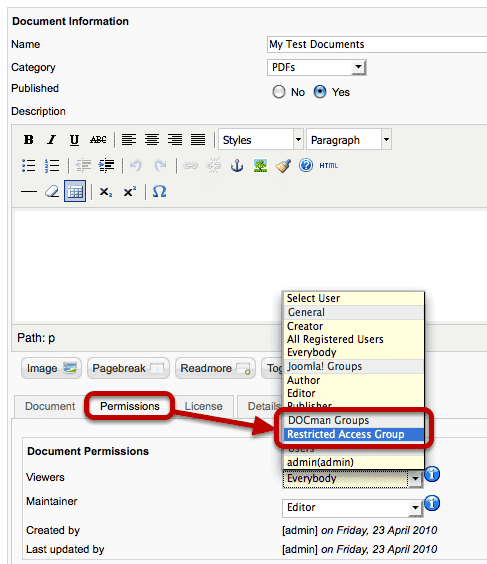
Now when you open up any document you can click "Permissions" and give access only to a certain group of users.
Place an Image Inside a Joomla Module
- Written by Steve Burge Steve Burge
- Published: 22 April 2010 22 April 2010
This lessons will show you how to insert an image into a Joomla module and make it appear to your site visitors.
Go to the Module Manager
Go to Administrator >> Extensions >> Module Manager
Click to Create a New Module
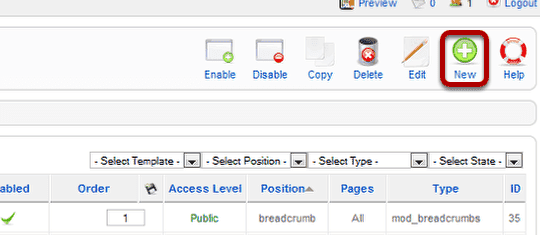
Click "New" in the top-right corner
Choose "Custom HTML"
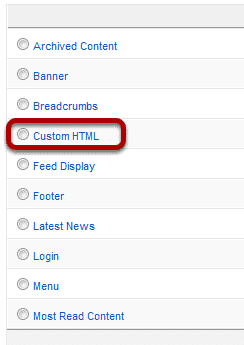
We can choose to create any kind of new module here. We'll choose "Custom HTML".
Find Your Image
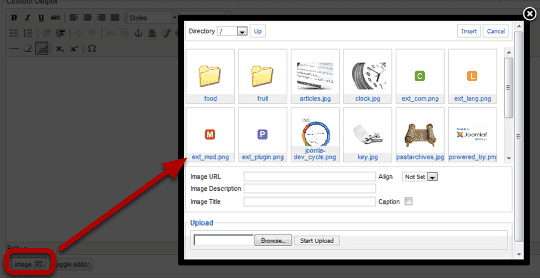
Click the Image button at the bottom of the page. You'll see a pop-up window. Either choose an image from here or click "Browse" and upload your image.
Insert Your Image
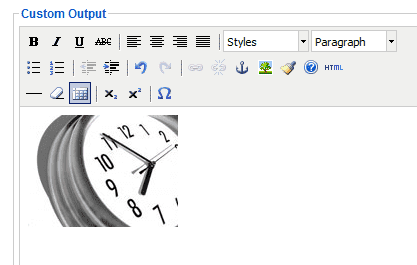
Click "Insert" and your image should be in the text editor.
Configure the Module

Choose your module position from the dropdown and then click "Save"
See the Image On Your Site
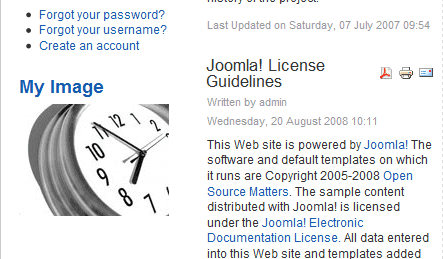
Visit the front of your site and the image should now appear on the page.
Changing the Joomla Homepage to a Different Component
- Written by Steve Burge Steve Burge
- Published: 19 April 2010 19 April 2010
This tutorial will show you how to place a shopping cart, photo gallery, video gallery or any other kind of component on your homepage, instead of the normal list of articles.
Step 1: Finding the Current Homepage
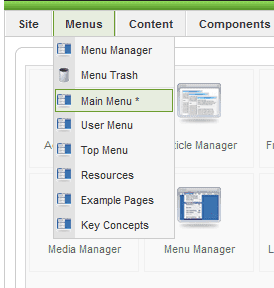
Login to your Joomla site administrator area and hover your mouse over "Menus". Click on whichever menu has the star beside it.
Step 2: Finding the Current Home Link
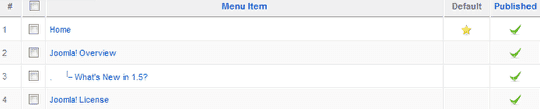
Look for the link that has the yellow star in the default column. That is your current homepage.
Step 3: Changing the Homepage
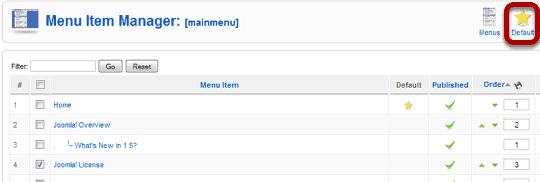
Check the box next to the link that you would like to be the homepage and then click "Default" in the top-right corner.
Step 4: All Done!
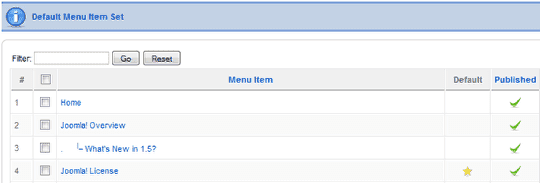
"Joomla License" is now your homepage.
Adding Downloadable Products to Virtuemart
- Written by Steve Burge Steve Burge
- Published: 19 April 2010 19 April 2010
This tutorial will show you how to add downloads to your Virtuemart products.
Access Your Virtuemart Configuration
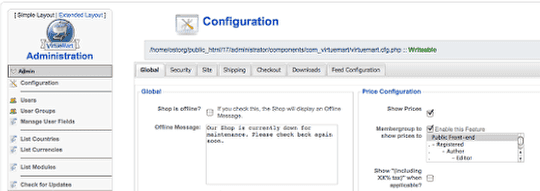
Go to Administrator >> Components >> Virtuemart >> Admin >> Configuration
Access the Downloads Tab
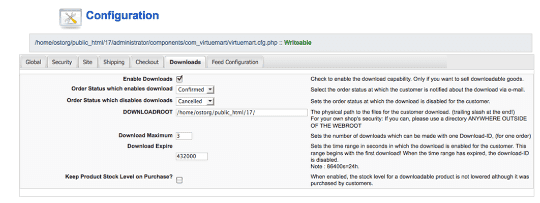
Check the box next to "Enable Downloads" and click "Save.
Open an Existing Product
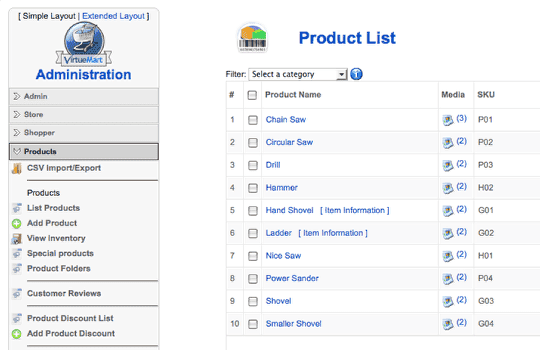
Go to Products >> List Products and click on an existing product.
Have a Virtuemart Product Open
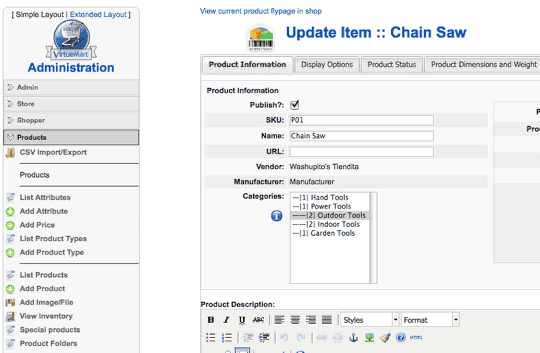
When the product is open, you'll see a new link on the left under Products. This new link will be called "Add Image/File". Click on it.
Upload Your File
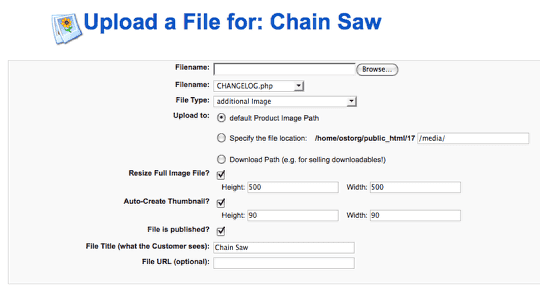
After clicking on "Add Image/File" you'll be taken to a screen like this where you can attach images to your product.
Seeing Existing Files
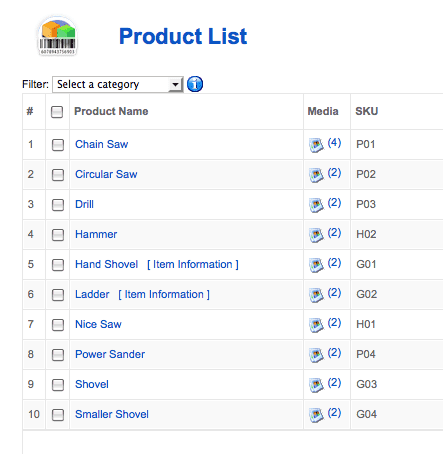
You can always check back and see which files are assigned to which products by going to Products >> List Products and clicking on the "Media" column.
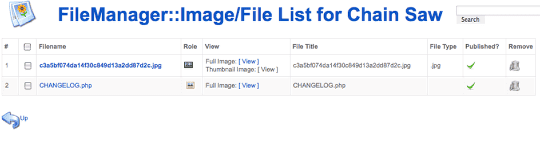
Managing Existing Files
Place Joomla Images and Videos in a Pop-up
- Written by Steve Burge Steve Burge
- Published: 08 April 2010 08 April 2010
 This tutorial was requested by a Joomla training student in our forum. They wanted to make images and videos on their site more interesting by showing them in a pop-up.
Our advice was to try Rokbox from Rockettheme. This extension can place images, videos, audio files, flash files or even entire websites inside a pop-up. This plugin is also available for WordPress.
We're going to show you several ways to use Rokbox on your site:
Installing Rokbox
- Rokbox can be downloaded from the downloads section of Rockettheme.com.
- Download both the "Content" and the "System" plugins. If you're using Joomla 1.5, download the top two files. They will be named:
- Rokbox Content Plugin
- Rokbox System Plugin
- In your Joomla site, go to Administrator >> Extensions >> Install / Uninstall and upload both.
- Go to Administrator >> Extensions >> Plugin Manager and enable both.
Testing Rokbox
The normal way of using Rokbox will only work inside articles. Try using this simple example as a test:
{rokbox}images/save.png{/rokbox}
That should place Joomla's save button inside a pop-up for you and also generate a thumbnail for you to click on.
If that doesn't work, you may have a problem with generating thumbnails automatically. You can then try one of these two options:
- Use a text link: {rokbox title=|click here|}images/save.png{/rokbox}
- Use your own image: {rokbox thumb=images/save.png}images/save.png{/rokbox}
Using Rokbox in Articles
There are lots of examples on the Rockettheme demo site: Rocketwerx.com. These are very simple examples to get you started:
- Remote images: {rokbox}https://www.ostraining.com/logo.png{/rokbox}
- Audio files: {rokbox}images/audio/example.mp3{/rokbox}
- Flash files: {rokbox}images/flash/example.swf{/rokbox}
- Youtube videos: {rokbox}https://www.youtube.com/watch?v=4BY40QvWQKE{/rokbox}
- Another website: {rokbox}https://www.google.com{/rokbox}
Using Rokbox Outside of Articles
You can use Rokbox in your other extensions. The only thing you need to do is modify your links so that they contain rel="rokbox".
For example < a href="https://google.com" > becomes < a href="https://google.com" rel="rokbox" > (I've added a space after each < and before each > so you can see the code)
We've used this technique inside many different extensions.
Configuring Rokbox
There are three places where you can configure options for Rokbox:
1) Inside Extensions >> Plugin Manager >> Content - RokBox
Here you can change the settings for the thumbnails that Rokbox generates automatically:

2) Inside Extensions >> Plugin Manager >> System - RokBox
Here you can select from several different themes for Rokbox. The default is "Light" which provides a white background, but there are others:

If you enable "Legacy Parameters", you'll also get a much wider range of options. Full documentation on those is available on the Rocketwerx site.
3) For Individual Pop-Ups
We saw some examples earlier. Here are some ways you can modify individual pop-ups:
- Set files sizes: {rokbox size=|400 100|} ... this will show an image, flash or video file as 400px wide and 100 high.
- Set website sizes: {rokbox size=|65% 80%|} ... this will show a website as 65% of it's normal width and 80% of it's height.
- Custom thumbnail: {rokbox thumb=|images/example.jpg|} ... so you don't have to use the one automatically generated by Rokbox.
- Custom title: {rokbox title=|This is a cool image|} ... this is what people will click on to see the pop-up, or if there's a thumbnail, this is what they will see if they hover their mouse over the thumbnail.
How to Automatically Add Joomla Links to Keywords
- Written by Steve Burge Steve Burge
- Published: 24 March 2010 24 March 2010
This tutorial is the answer to two questions we've been asked repeatedly:
- How can I automatically link keywords to the appropriate websites?
- How can I use internal links for links on my site?
Essentially they're looking to change a link from https://www.cnn.com to https://www.ostraining.com/link/cnn/. The link still goes to the CNN website, but it first goes to a url on the webmaster's own site.
Why Would People Want to Automatically Link Keywords to Pages?
This is what Wikipedia, the New York Times, Techcrunch and many other websites do in order to keep visitors browsing around their site. It also has substantial SEO benefits. To find out more, see Session 25 of our SEO class: Understanding Internal Linking.
Why Would People Want Internal URLs for Links?
- Statistics. They want to be able to count how many time a link has been clicked on.
- SEO. Some webmasters are worried about leaking their Google Page Rank to other sites. I am not a big believer in this technique, but I know several people who consider this to be important.
- Affiliates. People running affiliate programs want to protect their affiliate links:
- They think internal urls are more likely to be clicked than a url that looks like this: https://www.anrdoezrs.net/click-2660093-10423359
- Some people deliberately avoid clicking on affiliate links
- There are even rumored to be some computer-based viruses that are capable of inserting the spammer's affiliate ID into links to popular affiliate programs when people are browsing.
How to Create Internal URLs for Outbound Links
- Go to Administrator >> Components >> Weblinks
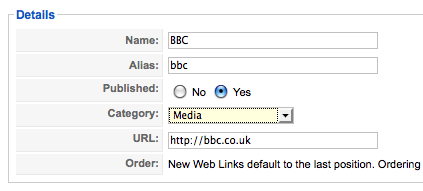
- Click "Categories" and then "New". Create a category for the kind of link you'd like to add. In this case, it will be "Media"
- Click "Links" and then "New". Add entries for the websites you'd like people to visit:
- If you're using Search Engine Friendly URLs, the URLs created will look like this: /weblinks/media/keyword/. If you're not, the URLs will be in this format: /index.php?view=weblink&catid=2:media&id=keyword&option=com_weblinks&Itemid=48
Automatically Add Links to Keywords
We're going to use a small plugin called the "Weblinks Content Plugin":
- Download the plugin from https://joomlacode.org/gf/project/weblinks/
- Go to Extensions >> Plugin Manager and enable the plugin.
That's it. Now every time you mention an entry in your Weblinks component it will be automatically linked. For example, these are our three recommendations for Joomla hosting companies: Rochen, Bluehost, Hostgator or even the example we gave earlier: BBC.
As people click on these links, you can see how many times they've clicked by going to Components >> Weblinks and looking at the "Hits" column:

K2 - the Missing Documentation (Part 2)
- Written by Steve Burge Steve Burge
- Published: 16 March 2010 16 March 2010
The hottest new extension in Joomla is K2.
Why? Normal Joomla articles provide you with a Title and Body. K2 gives you the flexibility to add much more information. Last week in Part 1 we covered the main administrator parts of K2:
- Installing K2
- The K2 dashboard
- K2 categories
- K2 fields and field groups
- K2 items
If you haven't done so already, I highly recommend that you go back and read Part 1 first. This week we're going to focus on the frontend of K2.
K2 Frontend
After Part 1, we should have a several categories, fields and items already inside K2. There are two items that we haven't covered yet, and they really affect the frontend of the site: users and tags.
K2 Users
Each user can have their own profile through K2. That information will appear at the bottom of each article they write, together with details of the other articles they've written. This is Chris, the author of the Canon EOS Rebel article:

- Administrators: People who are Managers, Administrator or Super Administrators can upload their information by going to Components >> K2 >> Users
- Front-end users: When you uploaded the original K2 package, it included a module called "K2 Login". Go to Extensions >> Module Manager and publish that module to allow front-end users to manage their profile.
One downside is that you can't create user fields currently, without writing a custom plugin. There is only:
- Name
- Gender
- Avatar
- Website
- Description
That stands in contrast to a really powerful feature of K2's user system:
K2 User Groups
K2 allows you to have different authors for different categories of your site. If you'd like to have a "Digital Reporter" who submits only review of cameras, you can go to Components >> K2 >> User Groups >> New and create that group from the screen below:

So you could create several different levels of users. To give just three simple examples:
- Contributors: They can add items in particular categories.
- Copy Editors: They can edit and publish items in particular categories.
- Senior Editors: They can add, edit, publish and control items in all categories.
If you use the "K2 Login" module, people can submit articles from the front-end without needing to write from the admin.
K2 Tags
K2 also has the option to add keyword tags to items. These are common in blogs and also is in catalogs so people can easily find related products. On your items, it will look like this:

These tags can be added easily: when you're submitting an item:

K2 Menu Links
Let's start seeing how our items look. Go to Menus >> Main Menu >> New and click K2. You'll see a screen like this:

- Item: Link to just one single K2 item.
- Categories: Link to items form one or more categories at the same time.
- Tag: You can add keywords to the bottom of each item.
- User Page (blog): You can have a list of all the items written by one author
- Latest items: This one explains itself :)
We've been looking at https://demo.getk2.org as an example. If you look there you'll see examples of those different kinds of layouts:

- "Product" = Item
- "Blog Entry" = Item
- "Category Layout"and "Product Categories" = Categories
- "Latest items" = Latest Items
An Overview of K2 - the Missing Documentation (Part 2)
Hopefully we've given you a taster of K2 and how you can use it to create articles with far more information and features.
We've taken you through all the basic aspects of K2. There's enough material for many more tutorials, including how to add video, photos, photo galleries, attachments and much more, but hopefully these two tutorials have been enough for you to catch the K2 bug!
K2 - the Missing Documentation (Part 1)
- Written by Steve Burge Steve Burge
- Published: 11 March 2010 11 March 2010

The hottest new extension in Joomla is K2.
Why? Normal Joomla articles provide you with a Title and Body. K2 gives you the flexibility to add much more information. For example, this is part of a K2 article about a camera called the Canon EOS Rebel:

Beyond just an article, you can add information about:
- Price
- Weight
- Color
- A link for more information
You can also add tags, videos, photo galleries, comments and more.
That is the essential benefit of K2 ... you can create articles with far more information and features.
Installing K2
- Go to https://getk2.org and download the file.

- You'll see a file on your desktop with a name very similar to K2_v2.2.zip
- Go to the administrator area of your Joomla site, then Extensions >> Install / Uninstall.
- Click "Browse" to locate the package file and then click "Upload File and Install".
- Go to Components >> K2
The K2 Dashboard
When you go to Components >> K2 you should see a screen like this one below:

You'll mainly be working from the top menu, so these are the links to concentrate on:
![]()
- Dashboard: Will take you right back to the screen you're looking at.
- Items: That's K2's name for articles. That's where you'll add all your content.
- Categories: Joomla places articles into Sections and Categories. K2 only has categories but you can have as many levels as you like.
- Tags: These are the small keywords you can add at the bottom of each item.
- Comments: K2 has its own comments system. Here you'll find all the comments written on your site.
- Users: A list of all your K2 writers.
- User Groups: Here you can control which categories and which features your writers have access to.
- Extra Fields: Remember the Price, Weight, Color for the camera? Those are fields.
- Extra Field Groups: If you have a lot of fields, you can organize them here.
Understanding K2
When you're getting started with K2, I'm going to recommend that you work in this order:
- Categories
- Extra Fields / Extra Fields Groups
- Items
- Other features ...
This Missing Documentation tutorial will take you through Steps 1, 2 and 3. Next week in Part 2 we'll cover the other features.
Step 1: K2 Categories
The reason we're starting with categories is that otherwise we won't have anywhere to put our items. If you create an item called "Canon EOS Rebel" you need a category called "Cameras" to put it into. There isn't an "Uncategorized" option as with Joomla.
Our aim for this tutorial is to build a site similar to K2's demo. The K2 demo has multiple different categories. We're going to focus on the Catalog. Let's start recreating that set up:
- Click "Categories"
- Click "New" and you'll see a screen like the one below:

- Enter your "Title" for the first category. In this case it will be "Catalog".
- The "Title Alias" is just same as with Joomla. It will be the URL of this page if you have Search Engine Friendly URLs.
- "Parent Category", "Inherit parameter options from category" and the other options can wait until we have more of K2 set up.
- For now just enter a description for your category or click "Image" to upload an image for this category. Both of these are identical to normal Joomla which allows a description and image for each category.
- Click "Save and New" and move on.
- Create more 4 categories called "Digital", "Climbing", "Bikes" and "Snowboard". Make sure to choose "Catalog" from the "Parent Category" dropdown.
- By the time you're finished you should be able to click "Save" and see a category tree like this:

We're going to re-create the K2 demo site so we need to do something else also. The demo site has a blog and a magazine layout. Go ahead and create a category called "Blog" and also one called "Magazine". K2 is big enough to handle products, blogs, magazines and more in just one installation:

Step 2: K2 Groups
Now that we have organization for our articles, we can start to add information to them. A product page is going to need different information than a blog or magazine page. That's where groups come in. We're going to recreate the same fields that we saw with the Canon EOS Rebel.
- Click "Extra Field Groups".
- Click "New".
- Enter "Additional Info" and click "Save.
- Click "Extra Fields"
- Click "New" and you'll see a screen like the one below:

We're going to recreate the fields we saw for the camera:
- Price
- Weight
- Color
- A link for more information
For all of them, we need to select "Additional Info" from the "Create New Group" dropdown.
- For Price, Weight and Color you can choose "Text Field" and click "Save".
- For the "More info" link you can simply choose "Link". You might also want to choose "External link" for "Link Text" and "Lightbox popup" for "Open in".
Hopefully when you're done, you'll see a screen like this:

Next we're going to bring Step #1 and Step #2 together and apply those fields to some of our categories:
- Click "Categories"
- Click "Catalog"
- Under "Associated "Extra Fields Group" choose "Additional Info".
- Open up "Digital". This time we're going to "Inherit parameter options from category" and choose "Catalog". That means that we can automatically update this category when we change "Catalog". We don't have to open it up and make individual changes to each category.
- Repeat the process for "Climbing", "Bikes" and "Snowboard".
Step 3: K2 Items
Now we're all set up. We have categories and information for our items. Let's go and write them:
- Click "Items"
- Click "New" and you'll see this screen:

Now you can really start to see the power of K2! Image, Image galleries, videos, extra fields, attachments and more!
- Enter "Canon EOS Rebel" into the "Title" field.
- Choose "Digital" from the "Category" dropdown.
- From there you're free to add as much information about this product as you want:
- Content: write your article (or copy and paste from the K2 demo)
- Image: upload an image that will go at the top of the page
- Image Gallery: to have an image slideshow you'll need to install and enable the Simple Image Gallery plugin from https://www.joomlaworks.gr, the makers of K2.
- Video: to add videos, install and enable the AllVideos plugin also from from https://www.joomlaworks.gr.
- Extra Fields: you should see Price, Weight and the other fields we added.
- Attachments: you can upload a document for people to download.
- Click "Save" and repeat the process for more items ...
An Overview of K2 - the Missing Documentation (Part 1)
Hopefully we've given you a taster of K2 and how you can use it to create articles with far more information and features.
Looking at the top menu, you can see that we haven't covered Tags, Comments, User, User Groups. We also haven't show you how to control the frontend layout of your K2 site. All of that and more is in Part 2 of our K2 documentation!
![]()