The Joomlashack Blog
Edit Your Joomla Site's Offline Logo
- Written by Steve Burge Steve Burge
- Published: 22 September 2010 22 September 2010
This is Part 2 of a series of tutorials on Joomla's offline page:
- Part 1 (Beginner): Take your Joomla site offline
- Part 2 (Intermediate): Customize your Joomla offline page
- Part 3 (Advanced): Create a new Joomla offline page
If you have a normal Joomla site setup, anyone can come along and visit. Anyone can browse around and see what you're doing.
However, what happens if you're building site for a client? You don't want the whole world to see. The same is true if you're developing a site for yourself and aren't ready to make it public.
To solve this, Joomla allows you to work on a site in private where only you (and your client) can see it? Instructions for doing that are here. This tutorial follow on from a simpler set of instructions showing how to take your site offline.
Video Showing How to Edit Your Joomla Site's Offline Logo
Step-by-Step Tutorial Showing Edit Your Joomla Site's Offline Logo
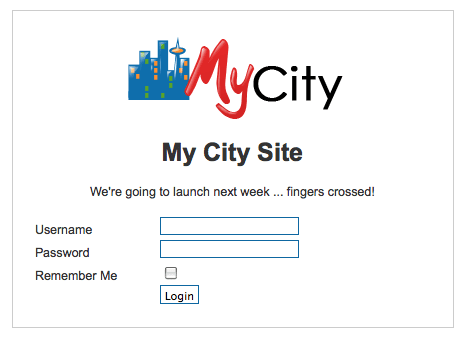
However, if you're expecting vistiors you might want to customize the login page so that it contains your logo and your information. Here's how to do it:
Change the Logo
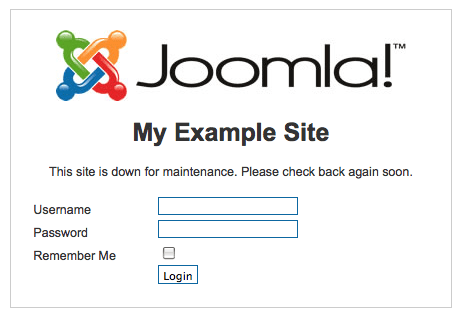
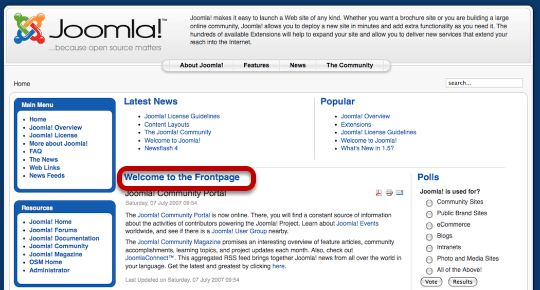
The default Joomla offline page has a large Joomla logo and the message "The site is down for maintenance. Please check again soon."
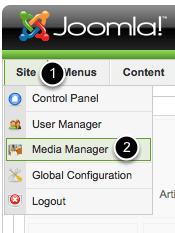
In order to to start changing the page, go to the Administrator area of your website, click "Site" and then "Media Manager".
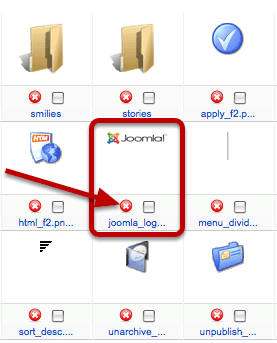
Click the red X next to the file called joomla_logo_black.jpg. We're going to delete that file so that you can upload your own.
Here's the thing ... you must make sure that the file you're uploading is also called joomla_logo_black.jpg. If it isn't yet, rename it.

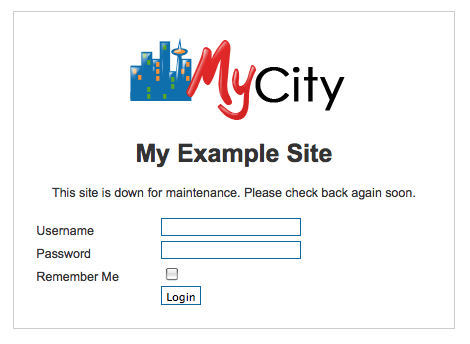
At the bottom of your screen, click "Browse" to find the image on your desktop. Then click "Start Upload". If your image had uploaded successfully you should be able to visit the front of your site and see the new logo.
Changing the Text
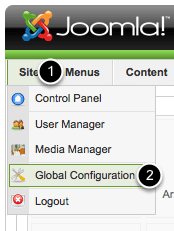
If you'd like to change the text that appears on your offline page, go to Site >> Global Configuration and you can edit two area:
- Offline Message
- Site Name
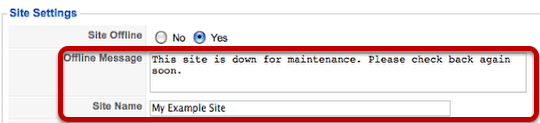
Click Save when you're done and visit your new offline page:
Remove Welcome to the Frontpage from Joomla
- Written by Steve Burge Steve Burge
- Published: 22 September 2010 22 September 2010
This is probably the most popular question we get asked by Joomla beginners setting up their first sites. "How do I remove the "Welcome to the Frontpage" text from my home page?"
Fortunately the answer is fairly simple (once you know it). Here's how to either remove or change that text:
Login and Go to Main Menu
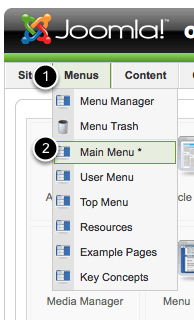
Login to the Administrator area of your site and click "Menus" then "Main Menu".
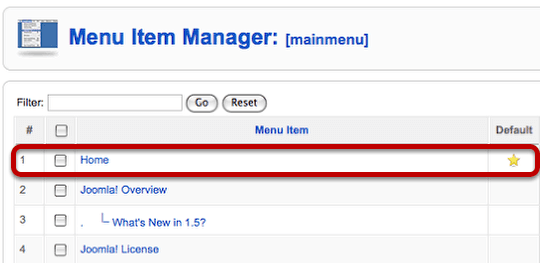
Click "Home" in the list of menu items.
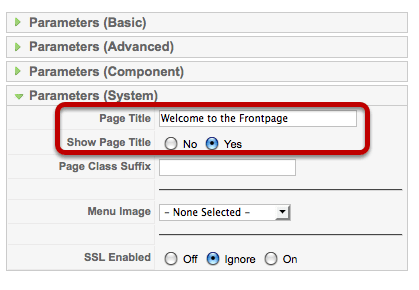
On the right-hand side, click "Parameters (System)".
There are two ways to fix this problem:
1) You can change "Welcome to the Frontpage" to something that matches your site.
2) You can set "Show Page Title" to "No" and just remove it entirely.
Understanding the Layout of the Bolt Template
- Written by Steve Burge Steve Burge
- Published: 20 September 2010 20 September 2010
Bolt is professional template that we provide free to our training students. It's simple, fast and loads as fast as a lightning bolt (hence the name!)
Because Bolt is not a complex template it's a great place to start learning Joomla template design. This tutorial will show you how to modify the column widths in Bolt. Hopefully it will also give you a good example of one method for creating flexible layouts:
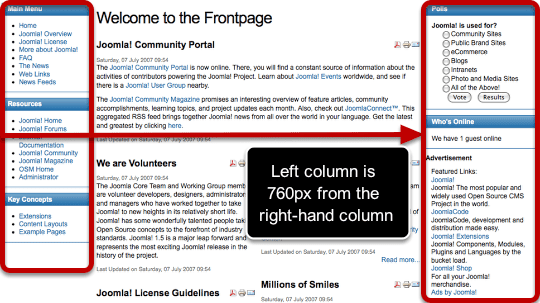
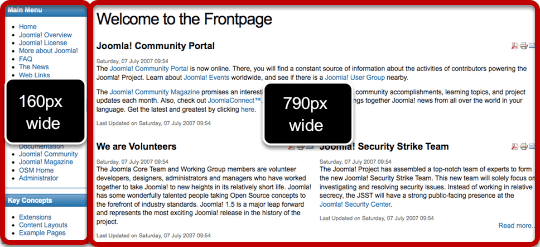
Default Three Column Layout

The first thing you should know is that the Bolt template is 960px wide. That's how much space we have to work with. By default, there are three elements taking up that space - the left column, center column and right column,. They are controlled by only four CSS elements.
First of all we have the left div. This div is straightforward and the most important element is the width:
#left {
 float:left;
 font-size:1.2em;
 overflow:hidden;
 width:160px;
 }
Next there is a second layer of CSS added to the left div. This only happens when there are three columns live on the site. The margin is 660px from the edge of the right column and actually controls the placement of left column. If this number were -770px then the left column would disappear off to the left-hand side of the site.
.threecolumns #left {
 margin:0 0 0 -660px;
 }
This is the CSS that controls the main body text. The left margin of 170px keeps the main body out of the way of the left column which is 160px wide.
.threecolumns #center {
 margin:0 10px 0 170px;
 width:480px;
 }
Finally we have the right column. This is even simpler than the left column - the main element is the width of 300px.
#right
 {
 float:left;
 font-size:1.2em;
 overflow:hidden;
 width:300px;
 }
Change the Right Column Width With Three Columns
We're going to reduce the right column size so that it is only 200px wide rather than 300px. Here's what we need to change.
Remember that the left column position is definited by its margin from the right column. So if the right column shrinks, we need to increase the margin if we want the left column to stay in the same place. Because the right column is shrinking by 100px, we're going to increase the margin by 100px from 660px to 760px.
.threecolumns #left {
 margin:0 0 0 -760px;
 }
Also, we're going to allow the center of the site to take up the extra 100px so let's increase its width from 480px to 580px:
.threecolumns #center {
 margin:0 10px 0 170px;
 width:580px;
 }
Finally, we actually need to shrink the right column from 300px to 200px:
#right
{
float:left;
font-size:1.2em;
overflow:hidden;
width:200px;
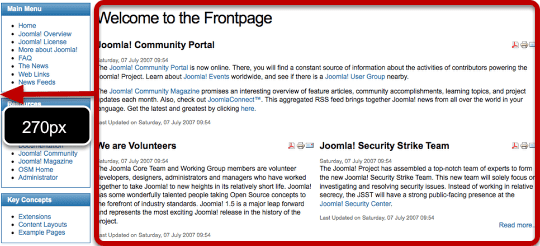
}Change the Left Column Width With Three Columns

We're going to increase the left column size so that it is 260px wide rather than 160px. Here's what we need to change.
Remember that the left column position is definited by its margin from the right column. However, the controlling element is the left-hand side of the left column. That's not moving. Neither is the right column. So we can leave this part alone:
.threecolumns #left {
 margin:0 0 0 -660px;
 }
We do need to change the width of the left column. This is fairly simple: we just change 160px to 260px:
#left {
 float:left;
 font-size:1.2em;
 overflow:hidden;
 width:260px;
 }
We're going to take that extra 100px from the center of the site so let's decrease its width from 480px to 380px:
.threecolumns #center {
 margin:0 10px 0 270px;
 width:380px;
 }
Finally, we can leave the right column alone:
#right
{
float:left;
font-size:1.2em;
overflow:hidden;
width:300px;
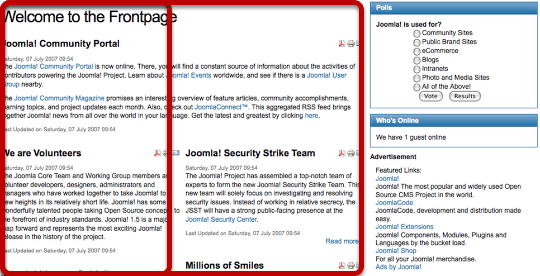
}Default Left Column Layout
Whereas the three column layout can be tricky, the two column layouts are much more staightforward. We're just using simple widths for the two columns:
#left
 {
 float:left;
 font-size:1.2em;
 overflow:hidden;
 width:160px;
 }
.leftcolumn #center {
margin:0 0 0 170px;
width:790px;
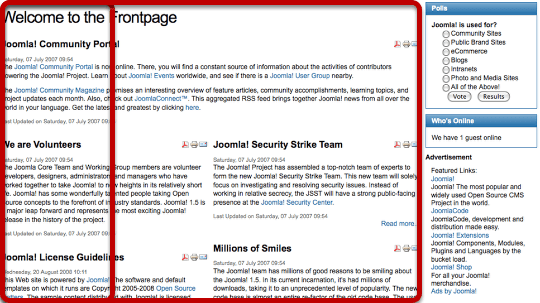
}Changing the Left Column Width
We're going to increase the size of the left column by 100px so let's increase the width from 160px to 260px:
#left
 {
 float:left;
 font-size:1.2em;
 overflow:hidden;
 width:260px;
 }
For the center column we need to reduce the width from 790px to 690px in order to add that width to the left column. We also need to accomodate the left column by increasing the margin from 170px to 270px:
.leftcolumn #center {
 margin:0 0 0 270px;
 width:690px;
 }
Default Right Column Layout
Again, the two column layout is staightforward. We're just using simple widths for the two columns:
.rightcolumn #center
 {
 margin:0 10px 0 0;
 width:650px;
 }
#right
{
float:left;
font-size:1.2em;
overflow:hidden;
width:300px;
}Changing the Right Column Width
We're going to make the right column narrower by 100px. So in order to fill up that space, let's make the center column wider by 100px:
.rightcolumn #center
 {
 margin:0 10px 0 0;
 width:750px;
 }
Now let's remove 100px from the right column.
#right
 {
 float:left;
 font-size:1.2em;
 overflow:hidden;
 width:200px;
 }
User Meta Plugin Extends Joomla's User Fields
- Written by Steve Burge Steve Burge
- Published: 17 September 2010 17 September 2010
User Meta is a small plugin that allows you to collect extra information from your users.
Most solutions to this problem require you to install a large and complex extension. Although User Meta does require a little coding it is a small and lightweight solution. Here's how you use it.
Download User Meta

Go to Joomlacode.org and download the User Meta plugin.
Upload User Meta
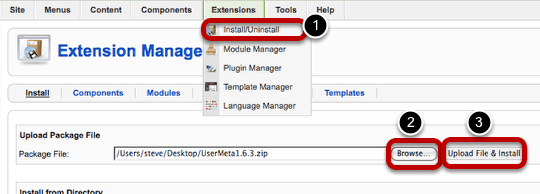
In your Joomla site, go to Extensions >> Install/Uninstall and upload the User Meta plugin. Then go to Extensions >> Plugin Manager and enable the plugin.
Setting Up the User Fields
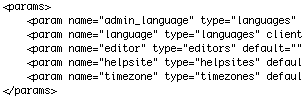
Next, we'll go and set up our extra user fields. Open your file manager and browse to /plugins/system/usermeta/. Open the user.xml file.
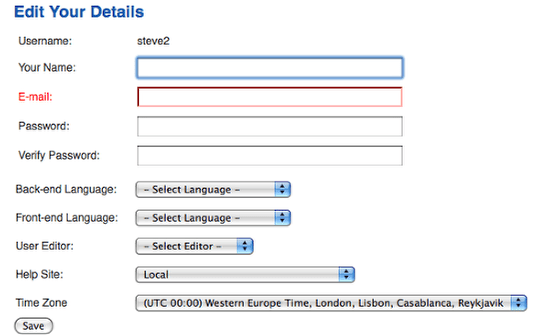
What you'll see are the current parameters that users see. These are "Back-end Language", "Front-end Language", "WYSYWYG Editor for this User", "Help Site for this User" and "Time Zone for this User":
Add Your Own Fields
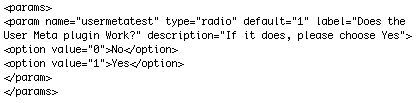
You can create your own parameters in here using Joomla's default system. It's the same plugin language used for all templates and extensions. I've chosen to use a radio button for this example, hence type="radio".
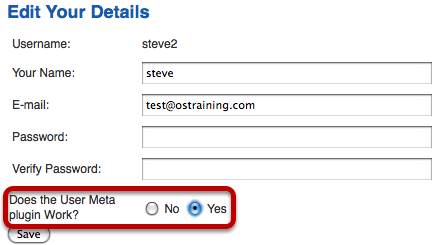
If you have any predefined choices you can save them using options as in the example above. When you save your user.xml file, go and login to the front of your site and visit the normal Joomla user account page. It should look like the image below:
Adding the Fields to Your Site's Registration
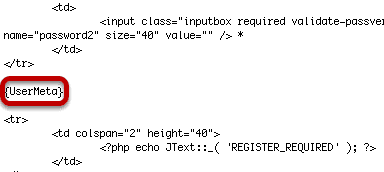
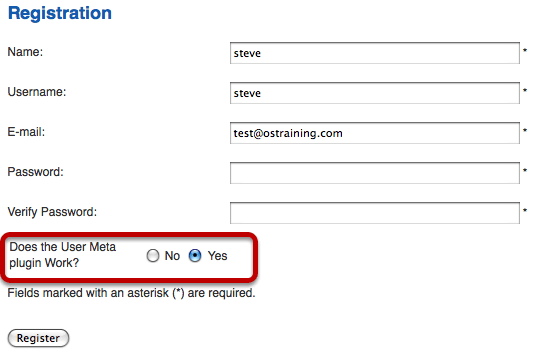
You can also add these fields to any Joomla layout page. However, it makes sense to add it to the registration form so you can collect this information when people join. All you need to do is insert: {UserMeta}. In order to use it in the registration form, I've edited /components/com_user/views/register/tmpl/default.php. The result is shown below:
Remember Not to Hack Core Files
If you do use this last technique for your site's registration, rather than hack the core registration file, it's best to just override it. Copy the file from /components/com_user/views/register/tmpl/default.php to /templates/your-template-name/html/com_user/register/default.php
Joomla's User Menu Links
- Written by Steve Burge Steve Burge
- Published: 10 September 2010 10 September 2010
One of our Joomla students was wondering what options they could set up for their site's users.
Joomla comes with eight different menu links for users to interact with. 6 of them allow users to control their account by logging in, registering or editing their account. The other 2 links allow people to submit information.
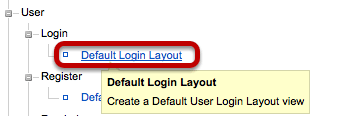
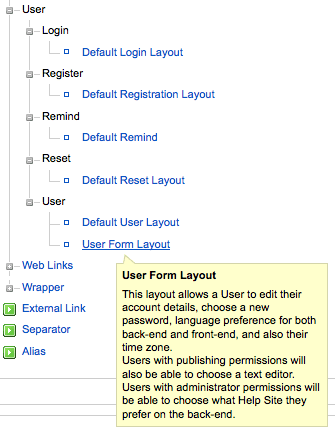
Here are the 8 links with the administrator view first (Menus >> Main Menu >> New) and then the front-end view that your users will see.
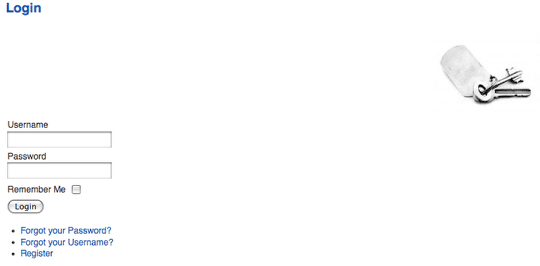
Default Login Layout - Allow People to Login to Your Site
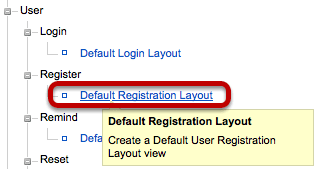
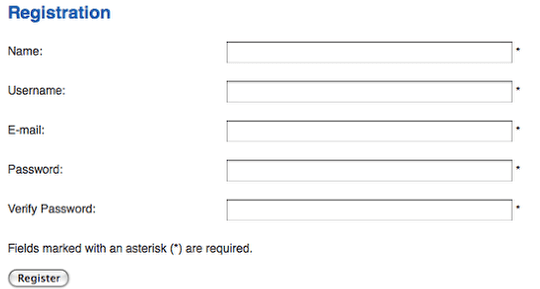
Default Registration Layout - Allow People to Register on Your Site
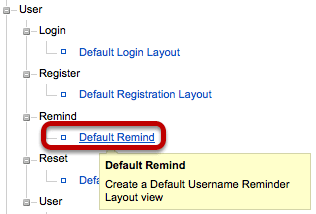
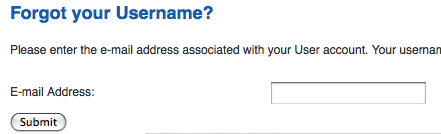
Default Remind - Recover Your Forgotten Username
If you've forgotten your username for your account, Joomla will send a reminder to your email address.
- If you've forgotten your email also ... you'll have to ask the site administrator.
- If you are the site administrator and you've forgotten your username and email (!), try this tutorial.
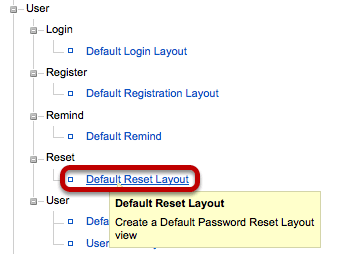
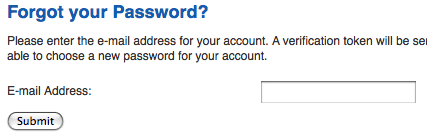
Default Reset Layout - Reset Your Lost Password
Many people will use the same password on many sites (it's not a good idea, but people do it anyway). So for security reasons Joomla will create a new password for you rather than send out the old one. First, you'll have to enter a token that Joomla send to your email address.
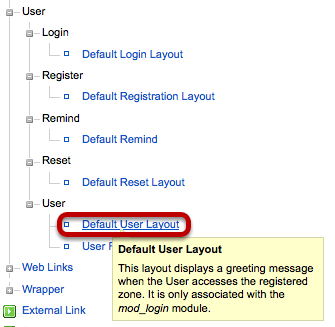
Default User Layout - Just a Simple Welcome Message
To be honest, this is not much use. Sorry.
User Form Layout - Allow Users to Edit Their Account
If you'd like to turn off the bottom 5 dropdown boxes from Back-end language down to Time Zone, you can do that by going to Site >> Global Configuration >> System >> Front-end User Parameters >> set that option to "No".

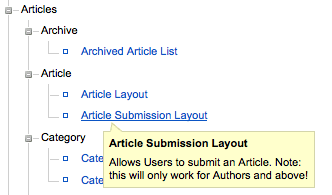
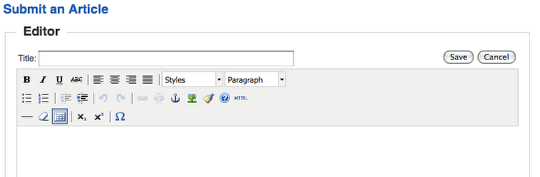
Article Submission Layout - Allow Users to Send in Articles
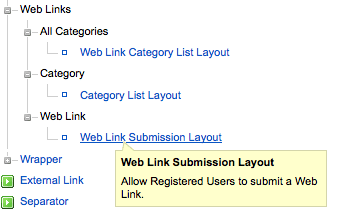
Web Link Submission Layout - Allow Users to Send in Weblinks

Using Firebug to Edit Joomla Templates
- Written by Steve Burge Steve Burge
- Published: 10 September 2010 10 September 2010
UPDATE: Firebug is not supported anymore. Please try Dev Tools in Firefox, or Developer Tools in Chrome instead.
Firefox is a great browser for working with Joomla templates.
In another tutorial we covered the Webdeveloper plugin. In this tutorial we'll cover the Firebug plugin which allows you to debug and edit your template's HTML and CSS files:
Install the Firebug Plugin
Click "Install Firebug For Firefox". You'll have to restart your browser for the installation to finish. When it is over, you'll see an extra Firebug icon in the bottom-right of your browser.
Enable Firebug
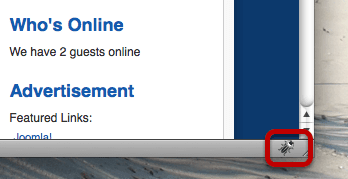
Click on the icon and it will be enabled.
Reload Your Page
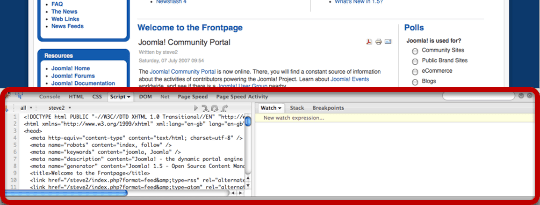
Refresh your page and you'll see Firebug starting to do it's work in a new panel at the bottom of your browser. There are lots of features in Firebug. We're going to use a couple that will allow us to analyse our Joomla template.
Use the Firebug Inspect Feature
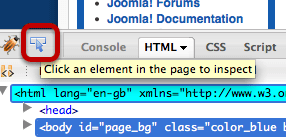
In the bottom-left hand corner of your browser, click on the blue arrow. You should get a pop-up message saying "Click an element in the page to inspect". That's what we're going to do.
Click the Logo

Click on the Joomla logo. There will be a blue box around the outside. At the bottom of the page, you'll see Joomla's HTML layout on the left and its CSS on the right. We can see that the logo area is placed on the page using this HTML:
. We can also see that it's controlled by the CSS i div#logo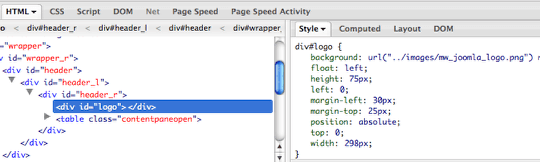
Edit the CSS

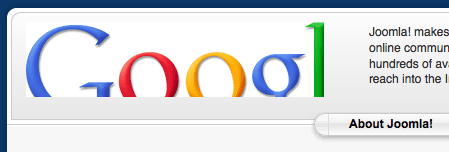
Put your cursor into the background CSS and it should pop-up as in the image above. You can edit any part of this. I'm going to choose to edit the image. I'm going to replace it with the Google logo: https://www.google.com/images/logos/ps_logo2.png

When you've done that, click your cursor somewhere else on the page and you should see that your change has taken effect:
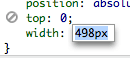
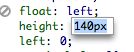
OK, that's great, but the image is still too large. Let's go back to the CSS. I'm going to change the width of the logo to 498px and also change the height of the logo to 140px.
Refresh your page and you'll be back to the design. All those changes only took place in your browser. No-one else saw them.
Fixing CSS Problems
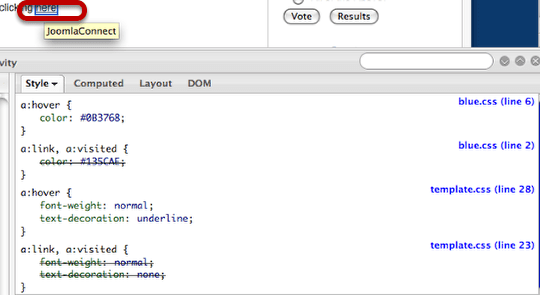
Imagine that I have a problem with the CSS in my template ... I'd like to change the color of my links. To get started, enable the Inspect feature and click on a link. The CSS will appear beneath. This image above shows all the CSS affecting the link, regardless of what file it appears in.

If you want to know where the CSS is stored so that you change it, Firebug will tell you exact file location and line number. However, first we need to make and test our changes. All you need to do is click on and change the color CSS:
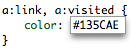
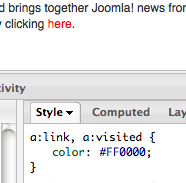
I'm going to change #135CAE to #FF0000 and that will change all the links to red:
Delete Joomla Site Sample Data Quickly
- Written by Steve Burge Steve Burge
- Published: 07 September 2010 07 September 2010
Before you start to build your Joomla site, I recommend you delete all the sample content.
Is this a common problem?. A quick search for some of the default text shows over 4 millions sites who have forgotten to remove it. Also commonly indexed are Newsfeeds and Weblinks. The Joomla sample data isn't relevant to your site and can often clog up up the administrator area.
UPDATE: Mass Content is now called OSContent and is available from https://joomlashack.com.
Allow Joomla Users to Manage Their Own Articles on the Frontend
- Written by Steve Burge Steve Burge
- Published: 06 September 2010 06 September 2010
It's really useful for writers on a website to be able to easily find and manage their articles. With Joomla, there's no central control panel for writers to do that. Fortunately there's an outstanding extension called Shack Article Layouts which solves that problem. Here's how to use it ...
After installing the Shack Article Layouts extension, the key step is to create a menu link to Shack Article Manager.
- For the "Menu Item Type", choose "Shack Article Manager".
- Notice all the tabs for this menu link? Shack Article Manager has dozens of different options for your frontend article management:

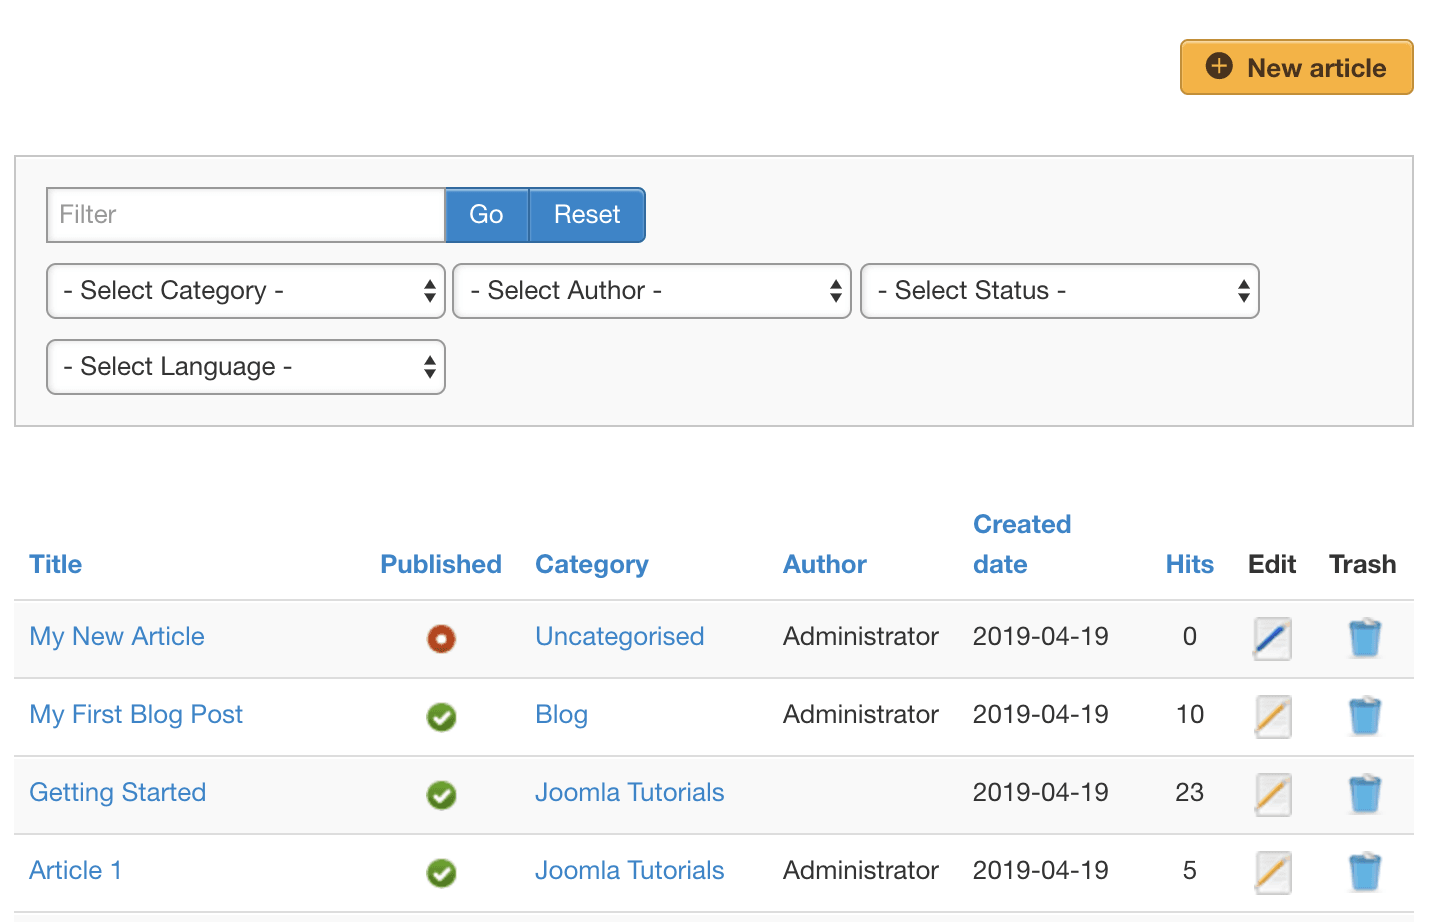
On the frontend of the site, visitors will be able to click this menu link and see the main Shack Article Manager screen. If you allow them, they can click "New article" and create content directly from the frontend of the site.
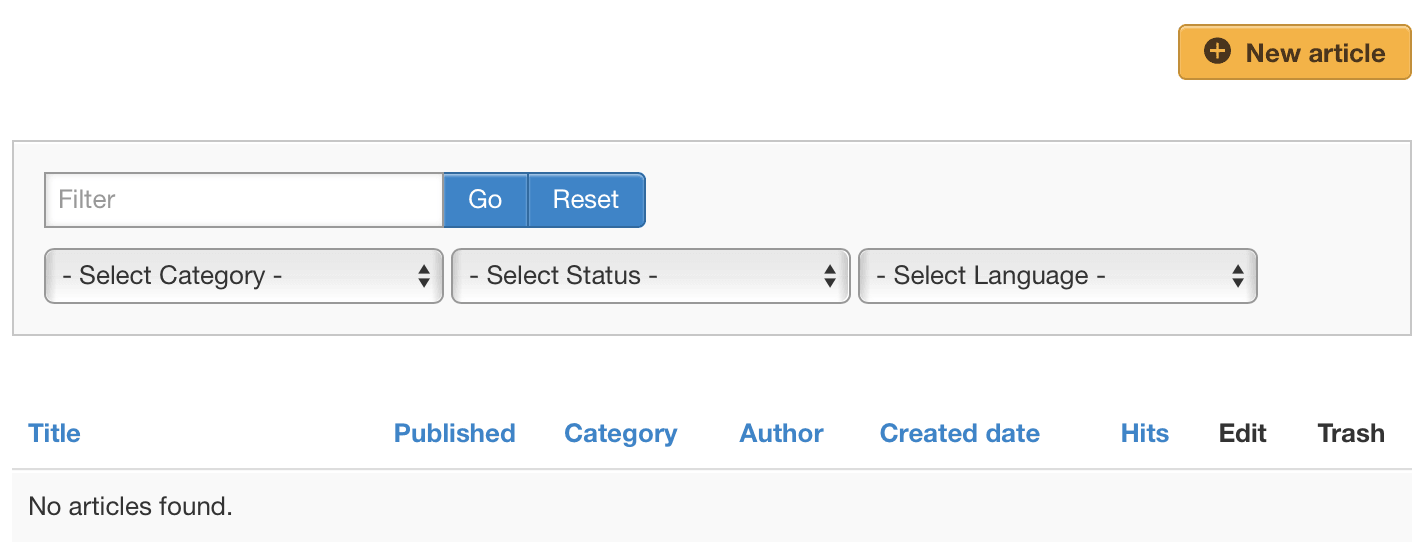
Here's a view of Shack Article Manager screen as an administrator sees it. They have full access to all the articles on the site:
Options for Shack Article Manager
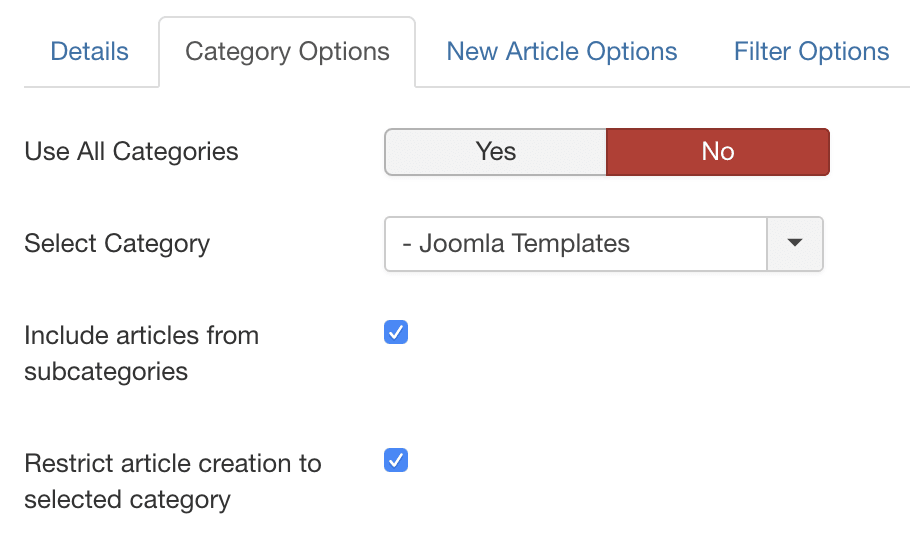
Shack Article Manager is highly configurable. For example, you can allow users to add content in any category, or you can restrict them to a single category:
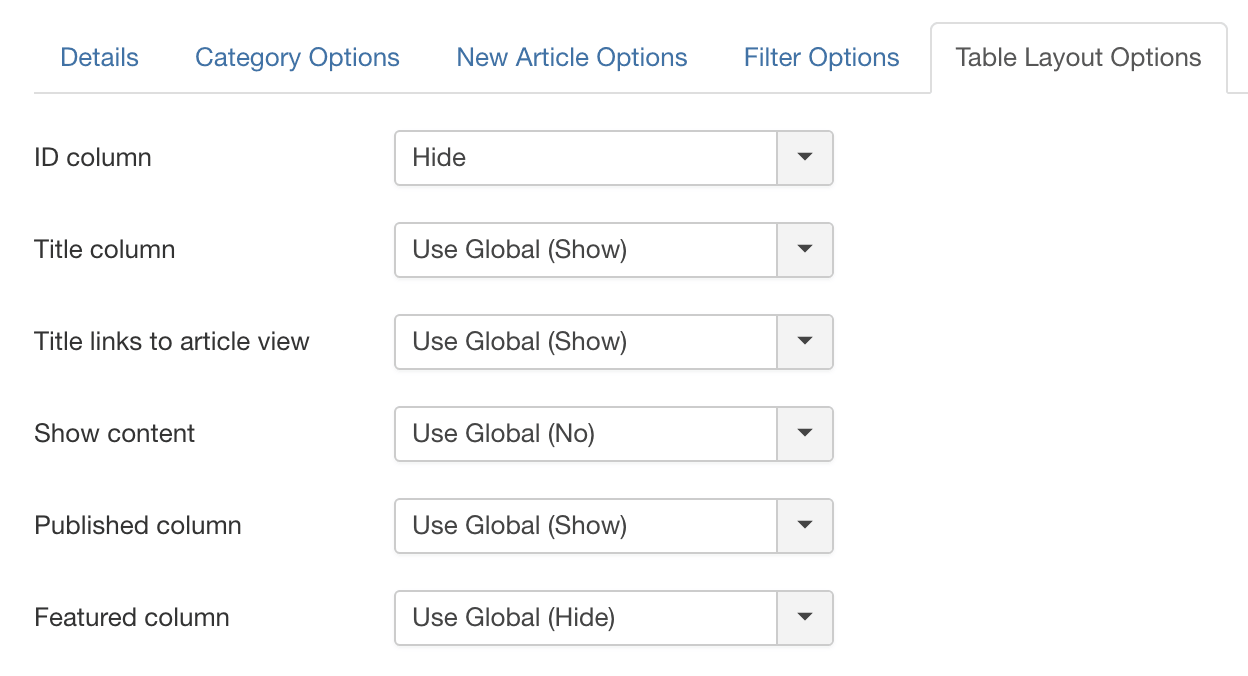
You can fully customize the frontend display of Shack Article Manager. Each element of the display can be shown or hidden, depending on your needs:
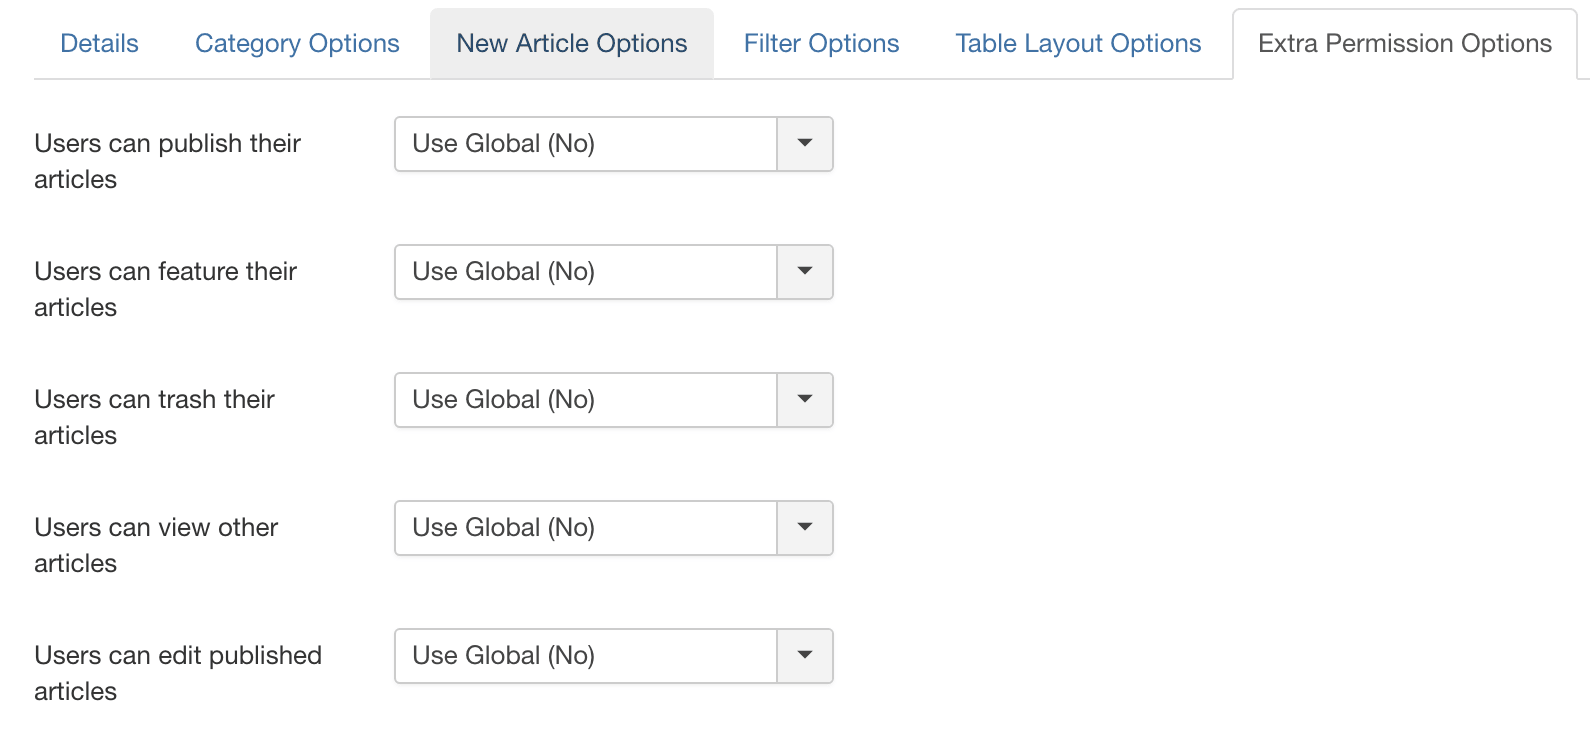
Shack Article Manager also has permissions that are easy to apply. You can decide if users can publish, feature, trash, view, or edit their published articles.
Video guide to Shack Article Manager
Video guide to allowing user to add content
Creating a Joomla Development Site
- Written by Steve Burge Steve Burge
- Published: 02 September 2010 02 September 2010
This tutorial will show you how to create a development site in Joomla. You can make changes to your test site and then, when you've tested and are happy with them, automatically push out those changes to your live site. This is professional development behavior, because it reduces the potential for mistakes and allows you eliminate most errors before they become public.
To create a development site we're going to use an extension called Working Copy.
Install Two Joomla Sites
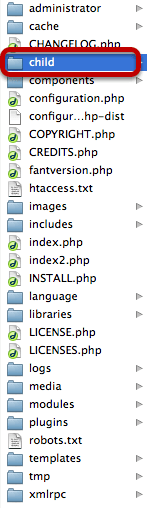
In order to synchronize a Joomla live site and a Joomla development site, you first need to make sure you have both of them. So, I've installed a live site and then a development site inside it, in a folder called /child/. You can use other arrangements, but this is a simple way to get started.
Note: Please make sure that you keep your development site private from visitors and from search engines. That means at least password-protecting the folder.
Getting Working Copy Set Up
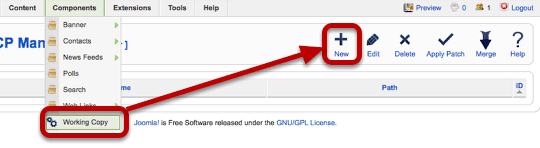
We need to install Working Copy on both of our Joomla websites. When we've done that, login in to one of them and go to Components >> Working Copy >> New.
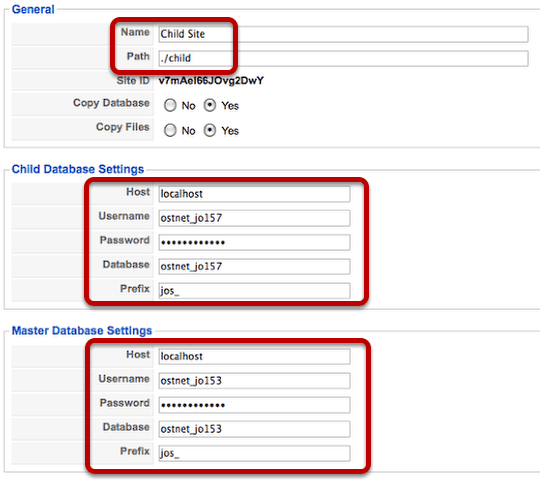
There are three pieces of information you need to enter in this area:
1) Choose a name for this entry and enter the path to the child website.
2) Enter the database information for the child site. If you don't know it, you can find this in the site's configuration.php
3) Enter the database information for the main live site.
That's all you need to do here. There other, more advanced settings, but that's enough to test Working Copy and get it working.
However, don't forget to enter this exact same data into both your live site and your child site.
Make a Change To Your Child Site

Now let's make a change on our child site - it doesn't need to be large. In fact, to test Working Copy, I recommend making only a minor alteration. In this case I modified the name of one article. I then went to the front of the site to check that the change was complete.
Seeing the Changes in Working Copy
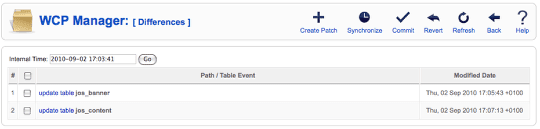
Now in your child site, go to Components >> Working Copy >> Differences and you'll see a list of the things that have changed. In this case it will an update to the jos_content table (when I edited my article) and an update to the jos_banner table (when I visited the site and saw the advertising banners).
Applying Changes to the Live Site
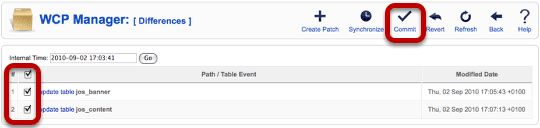
Select the changes you'd like to see made on your live site and click "Commit". You should see a blue "Commit completed" message.
Check Your Changes
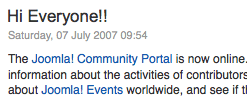
Go to your live site and check to see whether the change has been made.
Changing Files

OK, OK, you might say. That was fairly simple. We were able to move some database tables over. Well, let's have a look at how can we also move over file updates.
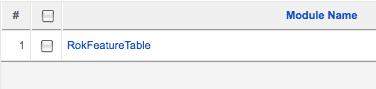
For, this example I've uploaded a module from Rockettheme to my child site, but any extension will do. You can see that 2-15 are file changes and 16-17 are module updates.
Check the Changes
Now, go over to your live site and look for the new extension. It should have been successfully transferred.
Commit the Changes
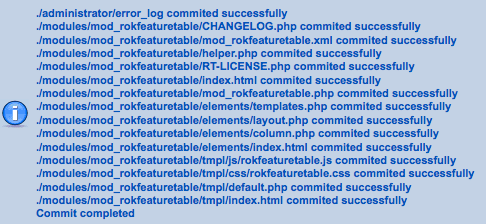
Now select those changes, click "Commit" and you should get a message saying that you've successfully moved the test changes to your live site.
Webinar by the Creator of Working Copy
Creating a New Joomla Offline Page
- Written by Steve Burge Steve Burge
- Published: 24 July 2010 24 July 2010
This is Part 3 of a series of tutorials on Joomla's offline page:
- Part 1 (Beginner): Take your Joomla site offline
- Part 2 (Intermediate): Customize your Joomla offline page
- Part 3 (Advanced): Create a new Joomla offline page
Joomla allows a site to be taken offline with a setting in the Administrator Global Configuration panel. When this happens, frontend access is no longer permitted and a special offline page is displayed.
How is the Offline Page Created?
By default, the offline page is created from the System Template. You'll find a file called offline.php in the /templates/system/ folder. The file itself is fairly straight-forward and can be divided into five parts:
Part 1. This single line provides error messages, for example if you try to login but enter the wrong information:
<jdoc:include type="message" />Part 2. This places a Joomla logo on the page:
<div id="frame" class="outline">

<img src="/joomla_logo_black.jpg" alt="Joomla! Logo" align="middle" />
Part 3. This places your site name on the page:
<h1>
 <?php echo $mainframe->getCfg('sitename'); ?>
 </h1>
Part 4. This places an offline message on the page:
<p>

<?php echo $mainframe->getCfg('offline_message'); ?>
 </p>
Part 5. This final and longest part of the code places a login box. This code runs from:
<?php if(JPluginHelper::isEnabled('authentication', 'openid')) : ?>
<?php echo JHTML::_( 'form.token' ); ?>
Creating Your Own Joomla Offline Page
You could of course just edit the default offline.php but you'd lose any changes as soon you upgraded your Joomla site. The best way to do this is to create a file called offline.php in your template folder. Copy the following files:
- /templates/system/offline.php
- /templates/system/css/offline.css
- /templates/system/css/offline_rtl.css
and add those file to:
- /templates/your_template/offline.php
- /templates/your_template/css/offline.css
- /templates/your_template/css/offline_rtl.css
This will give you a platform to safely customize the files.